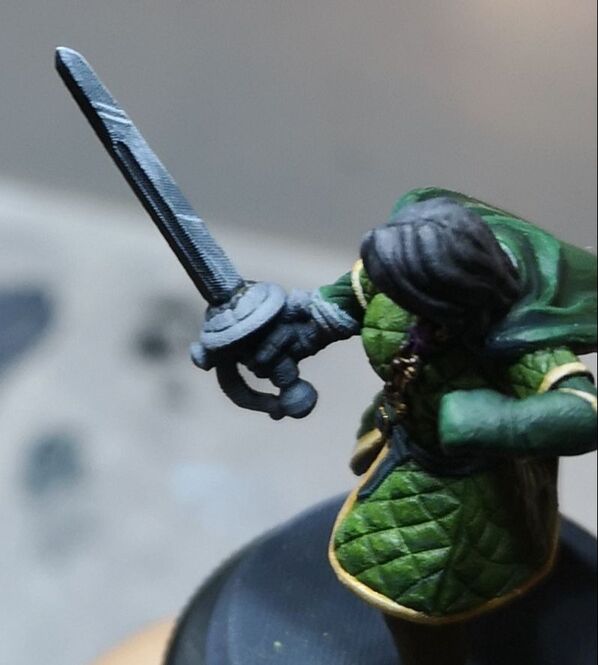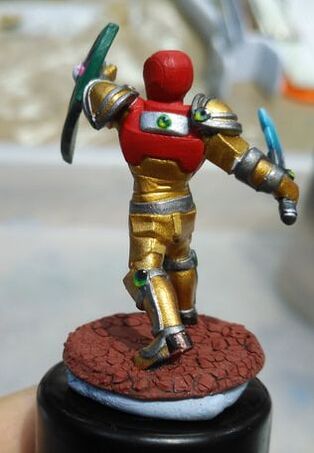
 I had pretty much sworn off Hero Forge figures after the sword and buckler lot because I was getting a bit tired of the low poly and cartoonish style of them. The capes and long smooth pieces of fabric were becoming especially irksome, as you could see the "facets" where they curved. However when a dear friend asked me to paint a little model he made, I couldn't refuse. Cassandra is a character in Tangled: The Series who was really meaningful for a myriad of reasons, and since he was moving country soon, this was a nice parting gift. The main challenge on Cassandra was that she was mostly all the same colour (am I working myself into a pattern here? Same thing happened with Black Panther). I decided to go with a cooler, deeper green on the cloak, and a warmer green for her gambeson, lined with a complementary yellow hem. I hadn't worked much with my greens yet either, so this was also an exercise in getting used to them. The darker colours like P3 Coal Black and Vallejo Model Colour Black Green were really nice and creamy and easy to blend with, but the lighter ones like P3 Wurm Green and P3 Necrotite Green were thinner, so it took some time to work up to the lighter colour.
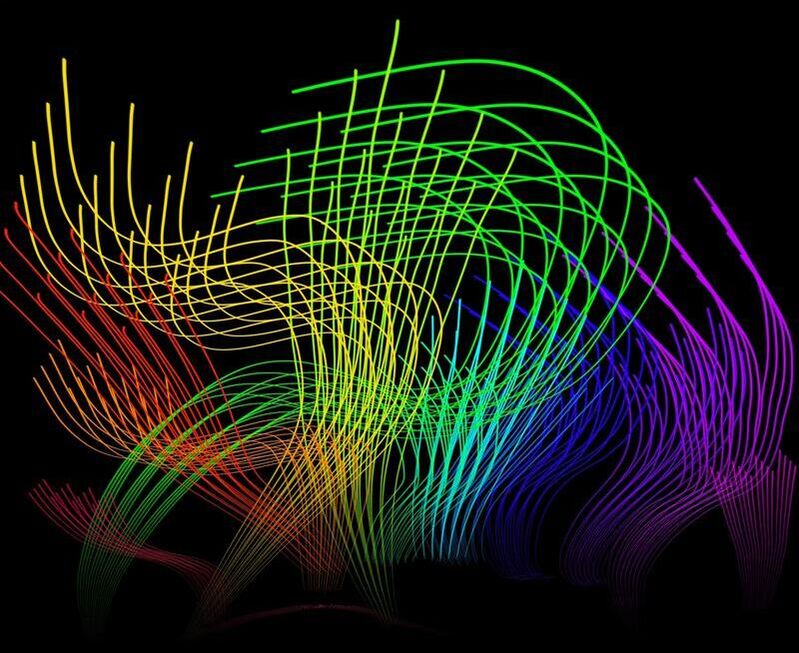
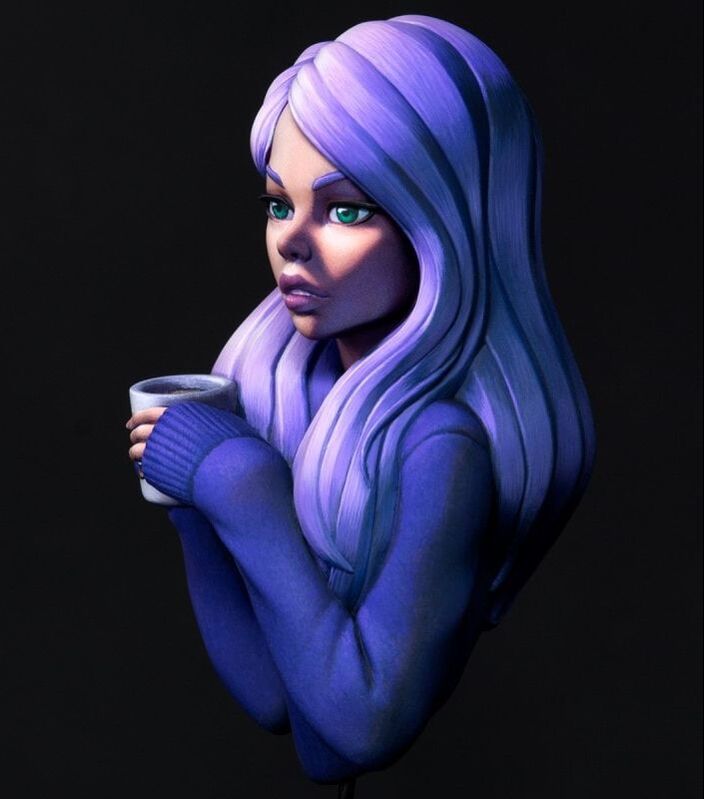
I don't enjoy black hair very much, as I find that I keep making it look grey, but I think that just means I have to be a little sharper with the highlights to make it look glossy. Similar in logic to NMM in that way. For the next time, I might also try it with a blue tinge instead of using grey. Seems to work in anime hair at least. For the final touch, I asked him if he would like a little inscription on the base, to which he jokingly replied "Cassidus," an amalgamation with his name. The heart over the "i" took me a few goes as I was pretty tickled. 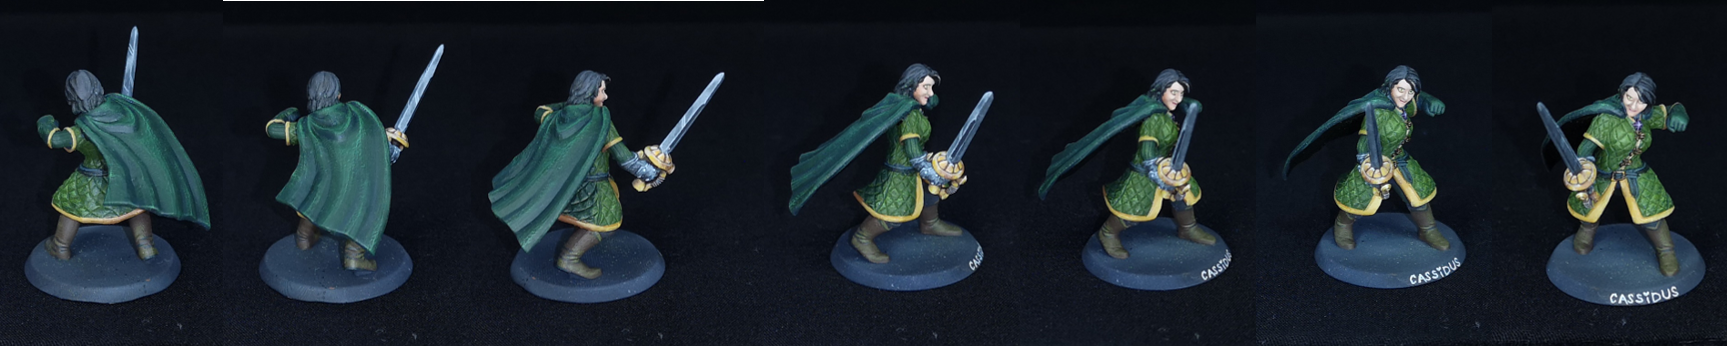 I entered a competition for the very first time in September! Frontier Wargaming was running a competition for one of their beautiful painting cases, and this was fantastic motivation to clear something from my ever-growing grey pile. I didn't set my hopes very high from the beginning, but after browsing through the case and all its add-ons, I really started to want it! The premise of the competition was to paint a miniature using a palette based on a photo. Participants would then pick colours found only in the photo, and use those to paint the miniature. They had linked to a few stock photo websites, and I chose this photo below (Mahadevu Udaya Bhaskar).
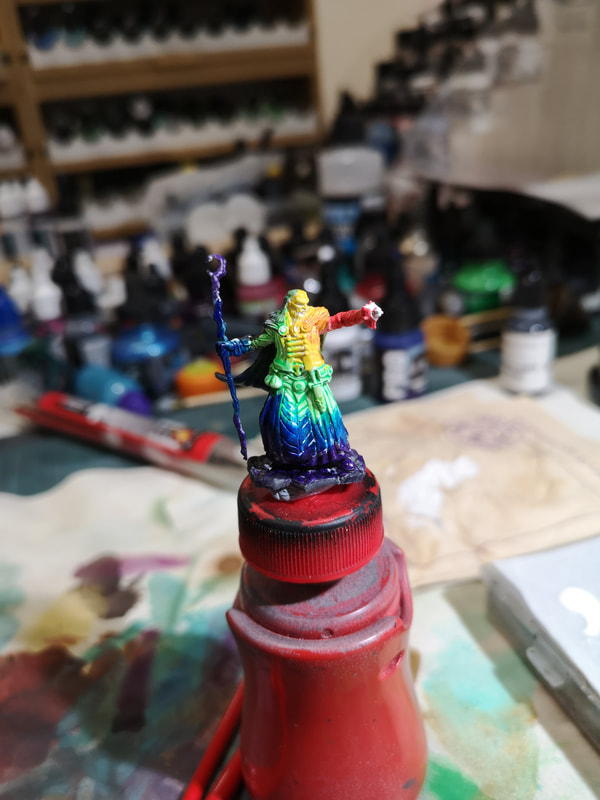
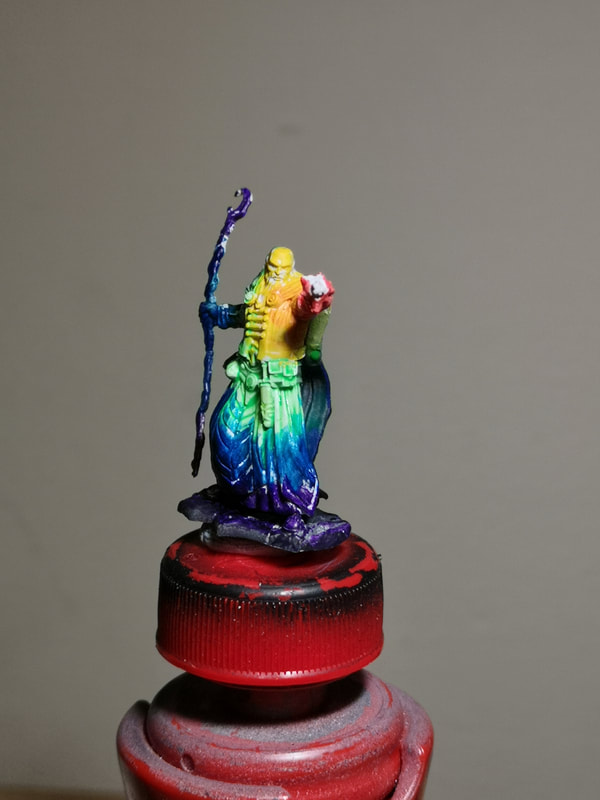
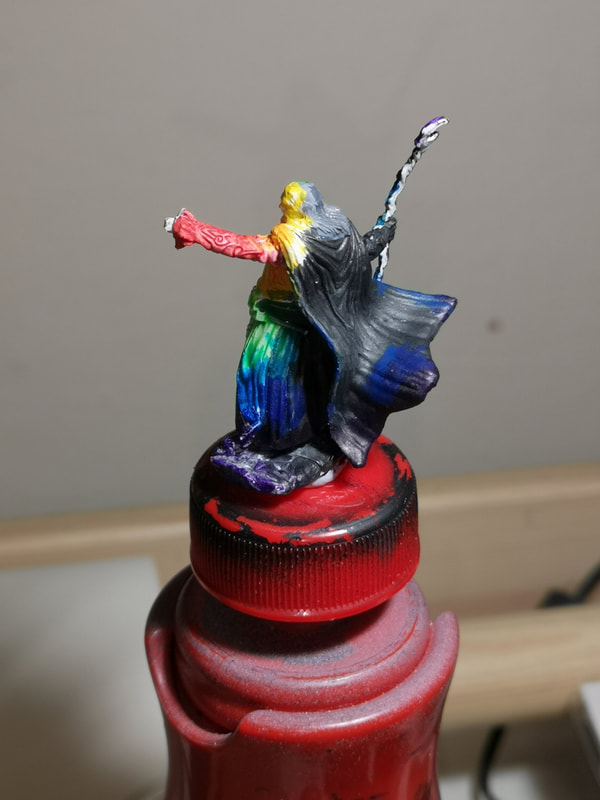
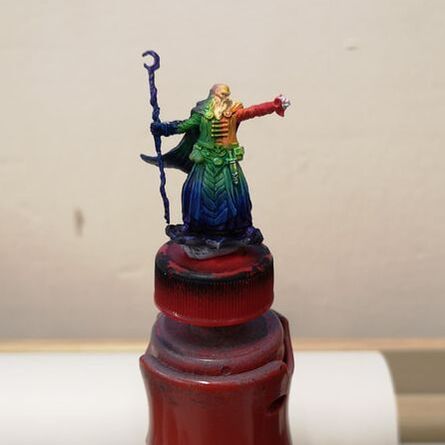
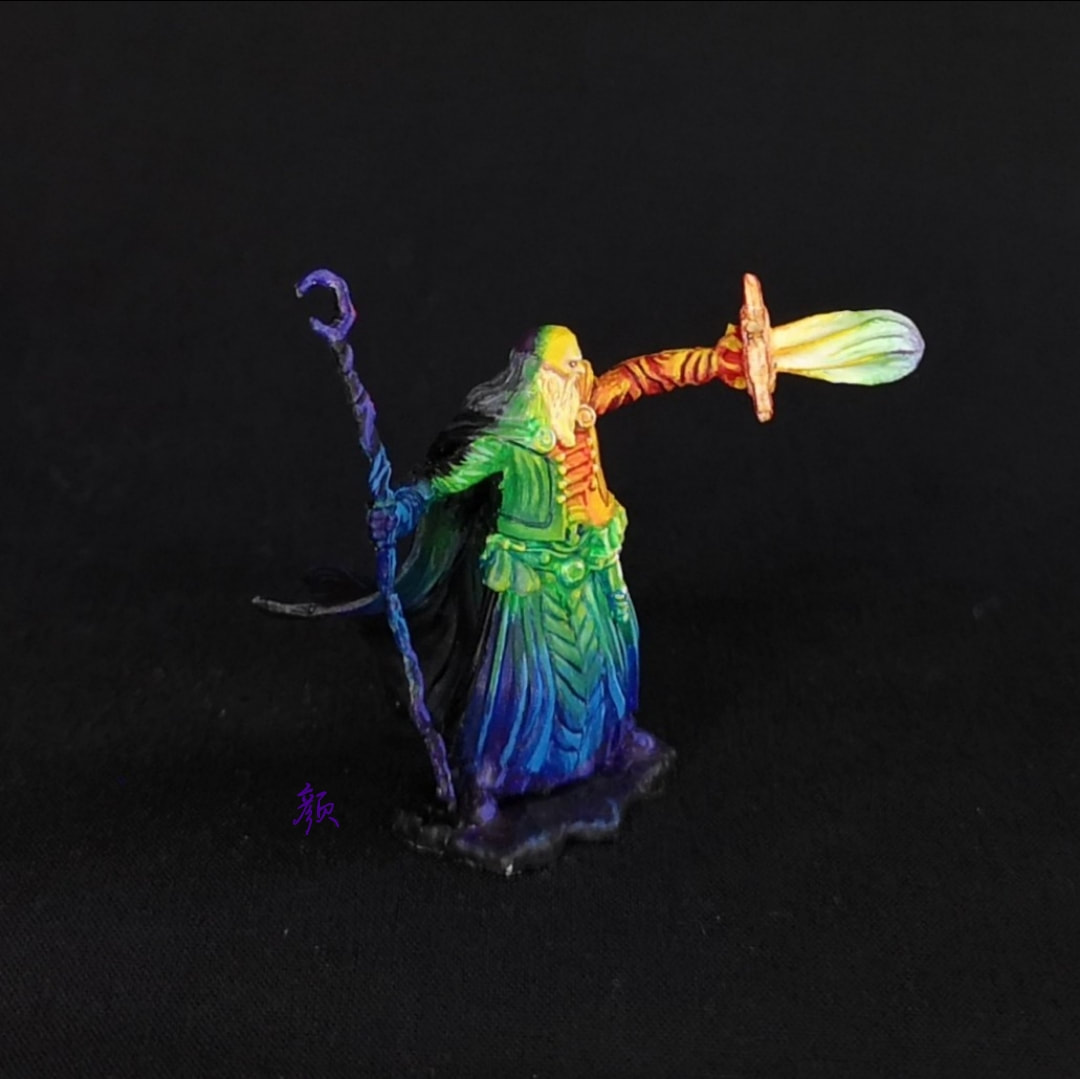
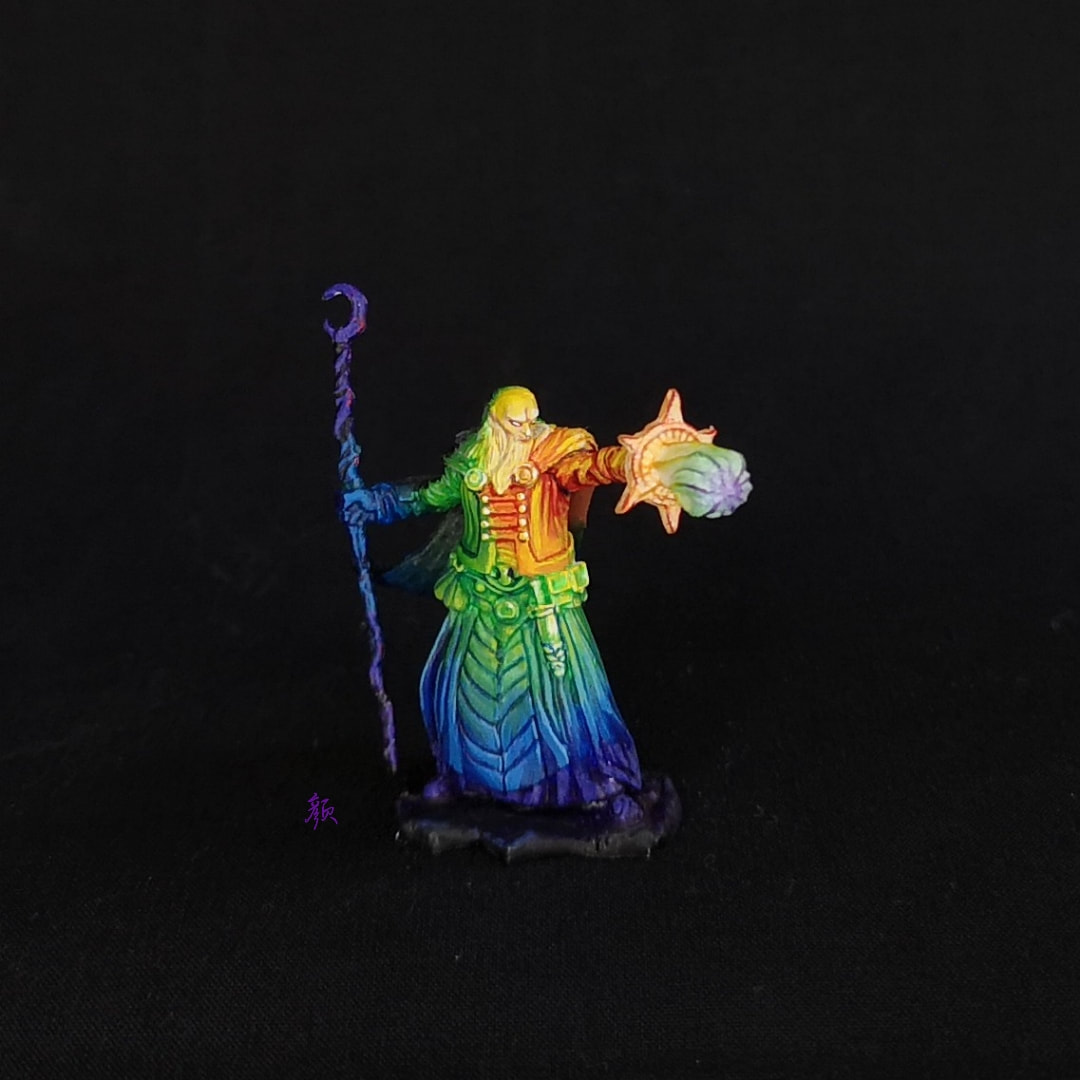
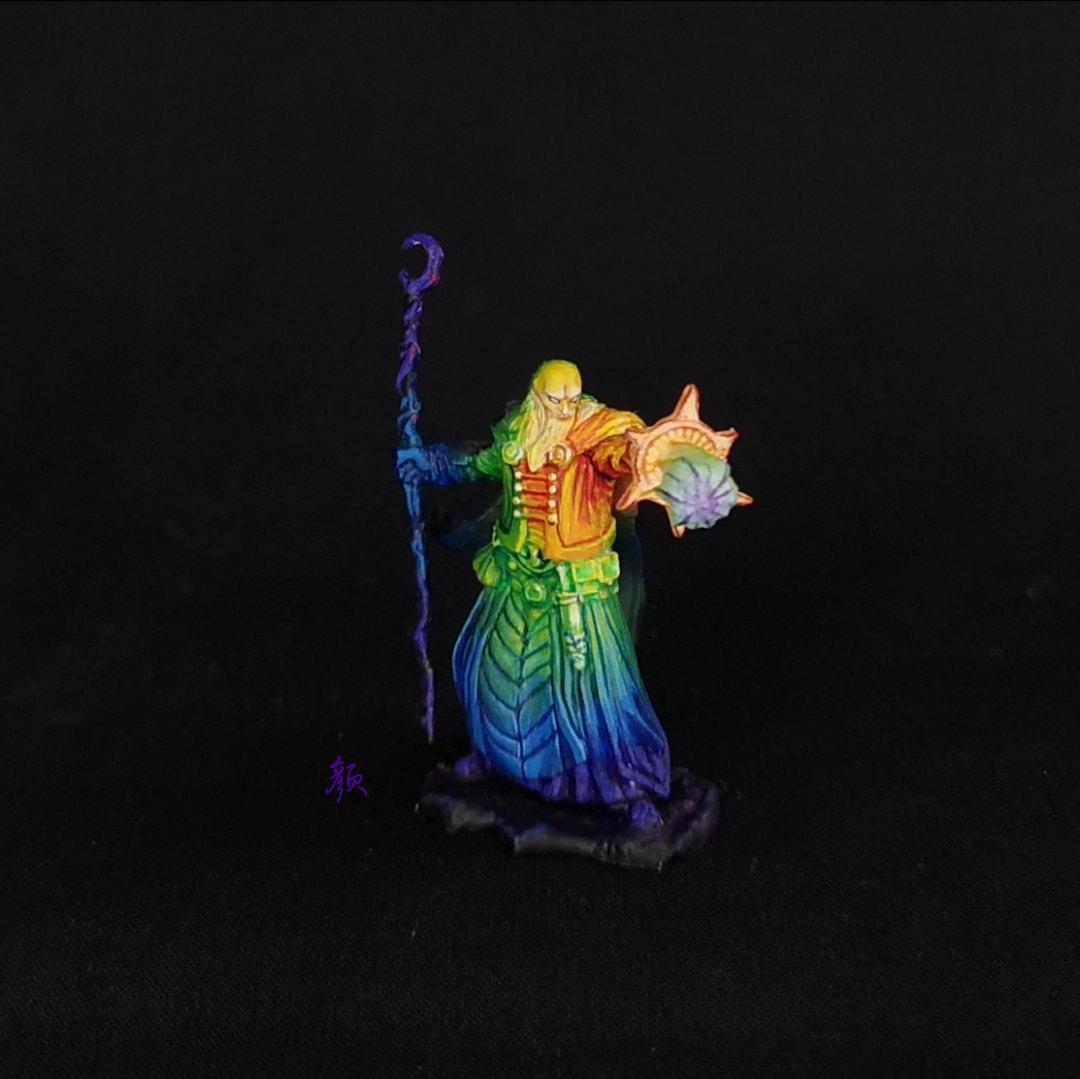
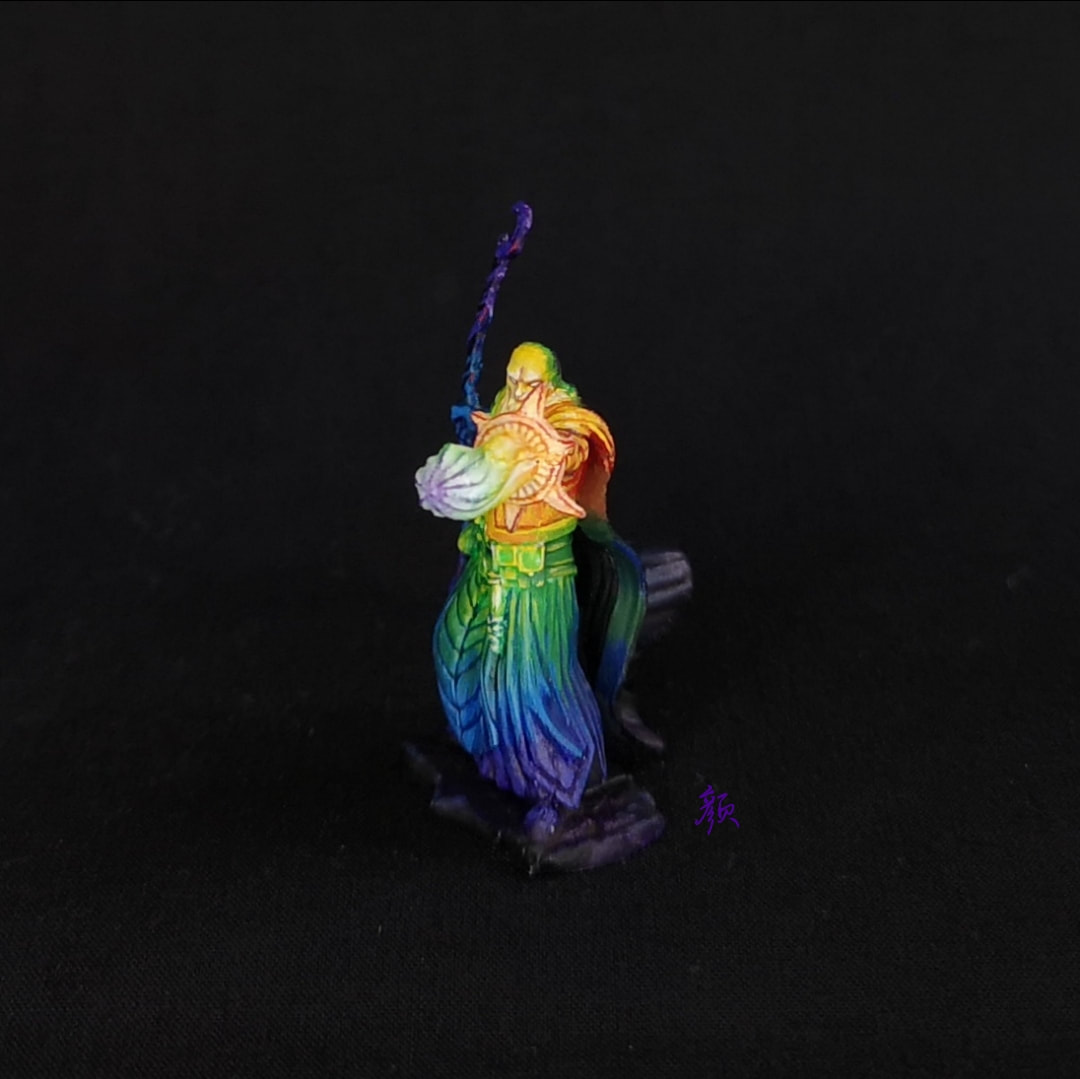
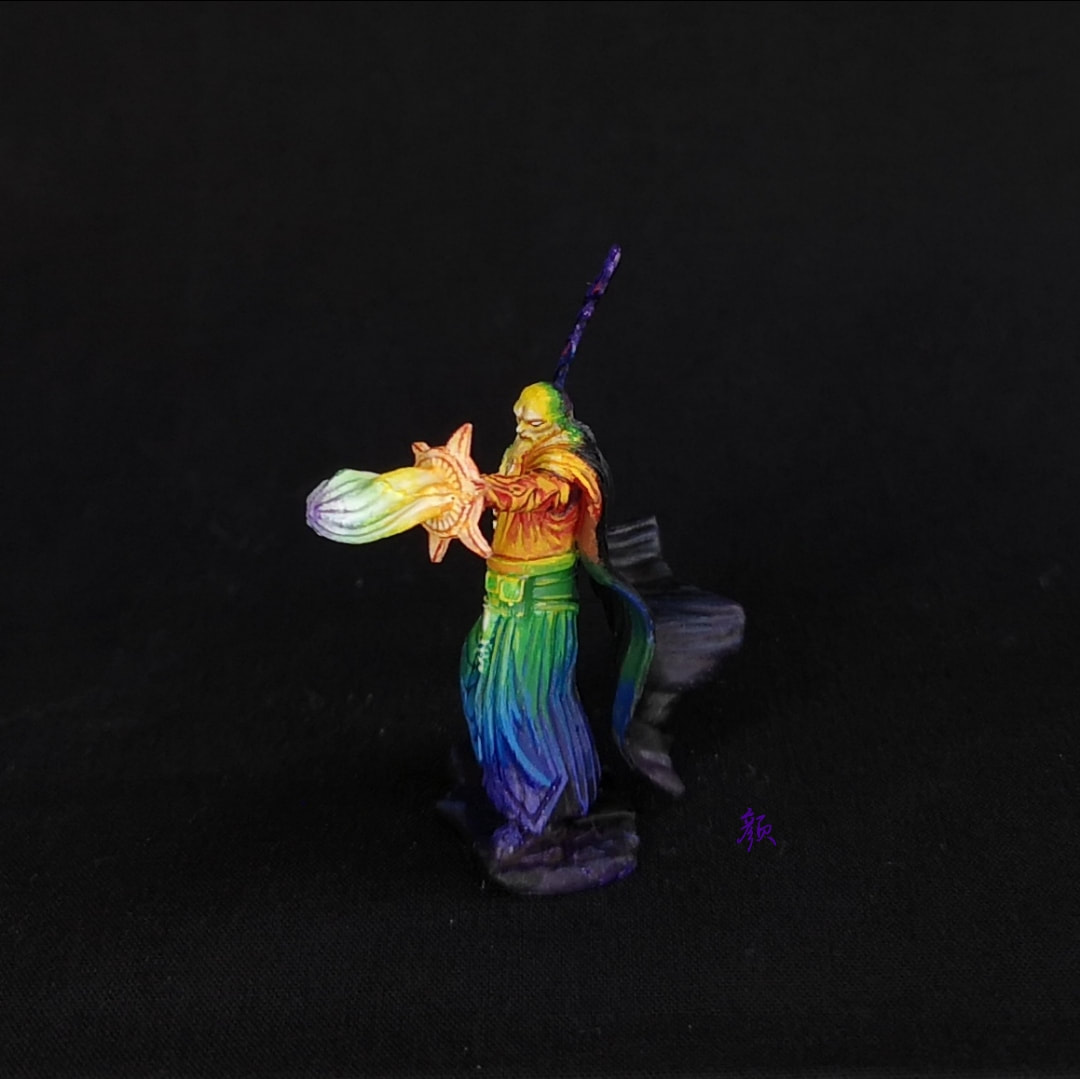
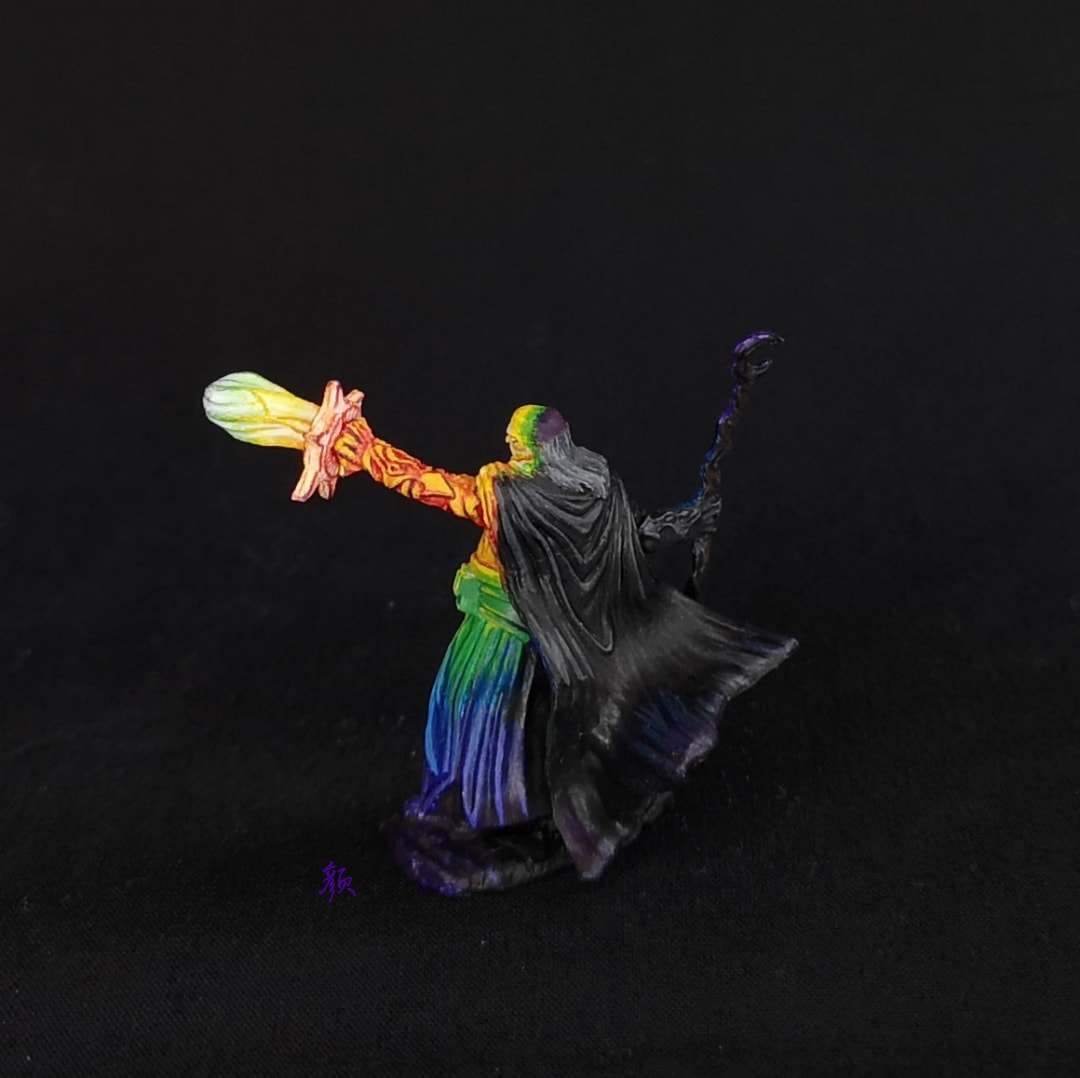
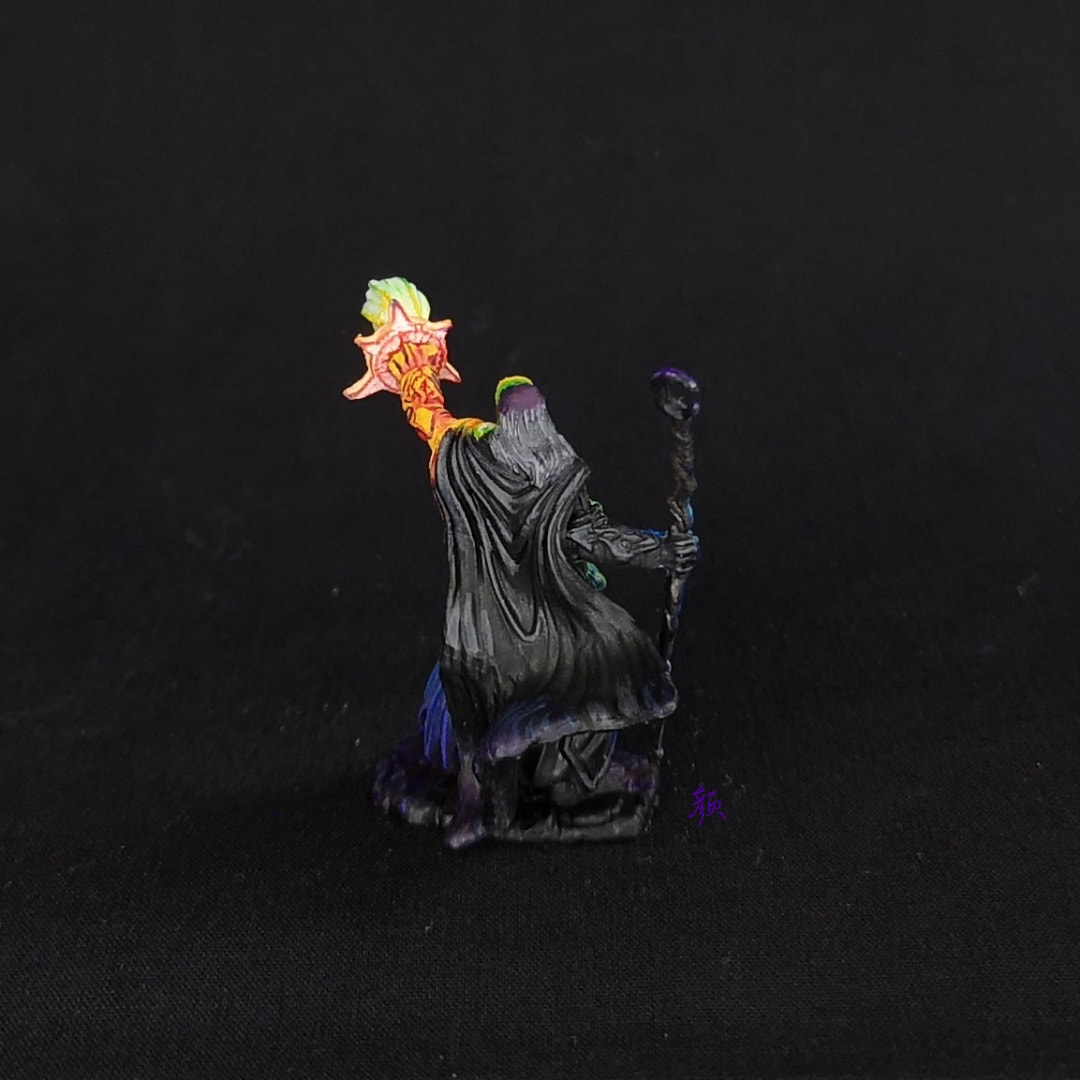
The photo reminded me of the Windows Media Player rainbow visualiser that pulsed and warped in sync with the music. I was also inspired by a project a friend was working on - he was painting up a figure divided up into three concentric circles, with each section being a different colour. I dug a wizard out of my grey pile, and submitted my entry. My initial idea was doing something like strobe lights, but I had difficulty finding any good reference pictures to get a reasonable idea of how to execute it. So I settled instead on the premise of the wizard shrouded in complete darkness, casting a prismatic spell. The process of identifying colours was a little bit trial and error, but I ended up going with Pro Acryl Bold Titanium White, Vallejo Nocturna Inferno Red, Pro Acryl Orange, Citadel Flash Gitz Yellow/P3 Cygnus Yellow, P3 Necrotite Green, P3 Iosan Green, Pro Acryl Transparent Blue, Pro Acryl Transparent Purple, P3 Thamar Black. A friend later suggested a very clever idea - to find the hexadecimal of the colours in the picture and cross-reference them on a database of paints - but unfortunately by the time I'd heard that, I was halfway through painting! I did an initial sketch of the areas where each colour would fall (and to check that my idea wasn't totally insane!). I had not planned this piece well - I was in the middle of moving house during this time, so I knew I was tight on time, and the deadline for submitting the finished piece was on 31 October. But after the first few hours of sketching out the areas of light, eyeballing the values, and refining the colours according to the stock photo, I was a lot less stressed. The biggest takeaway from this step was that I couldn't use the yellow as a section by itself. The value was too high (read: it's was too bright), so I decided to keep that as the highlight colour instead. This stage was also a great way to get used to working with the Pro Acryls, since this was my first big exposure to them. I have to say, I absolutely love their saturation. In fact, I went out the next day and bought myself a bunch from Game State. I'll be more to my collection over time.
It also dawned on me closer to the end, that the shadows closer to the spell effect would have to be much much harsher than I'd previously painted up. I ended up lining the shadows on the hand with Pro Acryl Transparent Purple (the darkest colour on the mini apart from black), and this was next to the P3 Cygnus Yellow, creating very dramatic, harsh shadows. After all of that came a little bit of waiting for the results of the competition to emerge. There was a tense round of community voting, followed by a private judging by the Frontier Wargaming panel. After a couple of weeks of trying not to get my hopes up, I received a happy message notifying me that this piece had won, and that my new painting case was on the way. I owe a huge round of thanks to my friend from Geekified for getting me through this little project. She's a fantastic friend and mentor, as well as a painter, printer, and retailer of geeky things. She's helped me to level up my painting so much, and I would not have been able to knock this wizard out so quickly without her 💛 she does painting streams and classes with Neo Tokyo Project every so often, so go hang out! If you enjoyed the article, please do consider donating your spare change on my Linktree https://linktr.ee/junebug.minis. It helps fund my art with supplies, new minis, and upskilling. Thanks for visiting, and enjoy the art!
 Painted with Monument Hobbies Igniters which are now out of stock, they've been upgraded to PRO Sable. Paints used are Formula P3, Vallejo, and Scale75. I bought most of my supplies at Game State. Primer: Stynylrez White. Skin: P3 Midlund Flesh (base), P3 Sanguine Base (shadows), P3 Ryn Flesh (highlight), P3 Menoth White Highlight (top highlight), P3 Skorne Red (lips). Red fabric: P3 Skorne Red (base), P3 Sanguine Base (shadows), P3 Midlund Flesh/P3 Skorne Red 2:1 (highlight), P3 Inferno Orange (glaze, sword grip highlight). Black fabric/boots: P3 Thamar Black (base), VCM French Mirage Blue (drybrush/layer), P3 Frostbite (top highlight). Blindfold: P3 Frostbite (base), VCM French Mirage Blue + flow aid (shadows), P3 Morrow White (highlight). Cowl: P3 Frostbite/French Mirage Blue 1:1 (base), VCM French Mirage Blue (shadow), P3 Frostbite (highlight). Sword: P3 Pig Iron (base), P3 Boiler Black (shadows). Sword gem: P3 Sanguine Base, P3 Skorne Red, P3 Inferno Orange, P3 Sulfuric Yellow, P3 Morrow White. Base rocks: P3 Greatcoat Gret (base), P3 French Mirage Blue (drybrush), P3 Frostbite (highlight), VCM Smoke/water 1:1 (wash), P3 Khardic Flesh (drybrush). Base grille: GSW Steampunk Copper (base), P3 Eldritch (stipple) P3 Cygmar Blue Highlight (stipple), GSW Steampunk Copper (stipple), S75 Dwarven Gold (highlight). 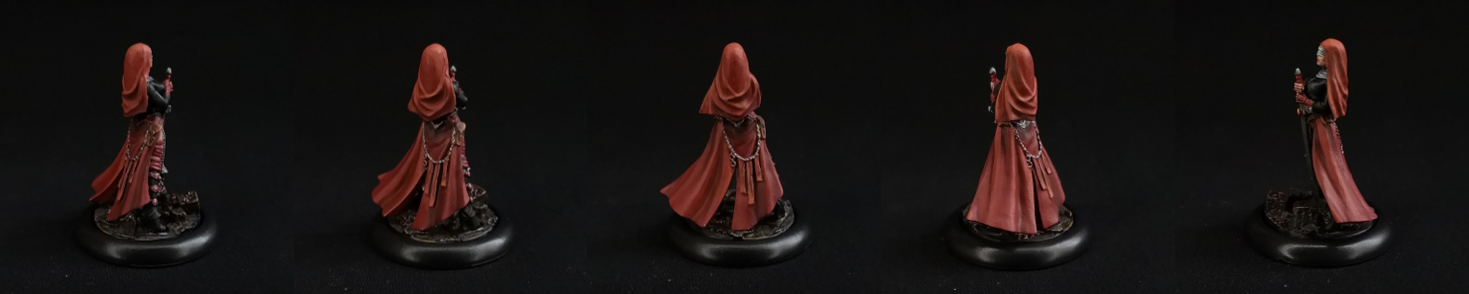 If you enjoyed the article, please do consider donating your spare change on my Linktree https://linktr.ee/junebug.minis. It helps fund my art with supplies, new minis, and upskilling. Thanks for visiting, and enjoy the art!
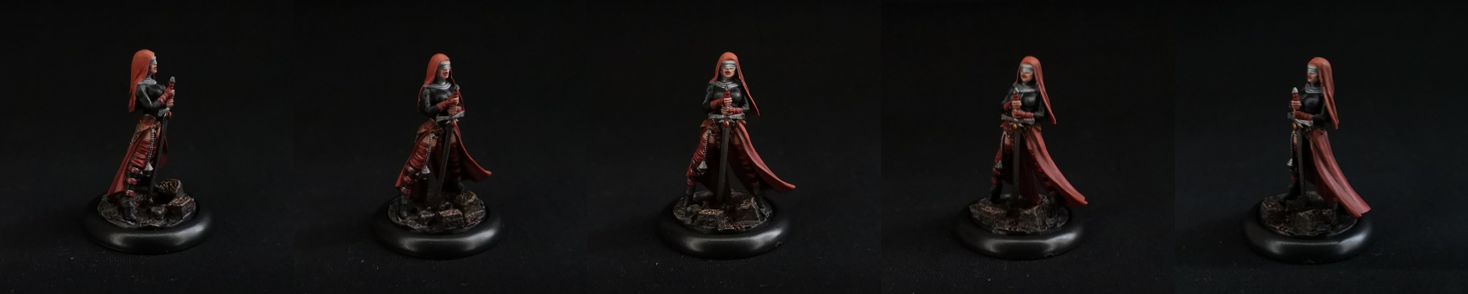
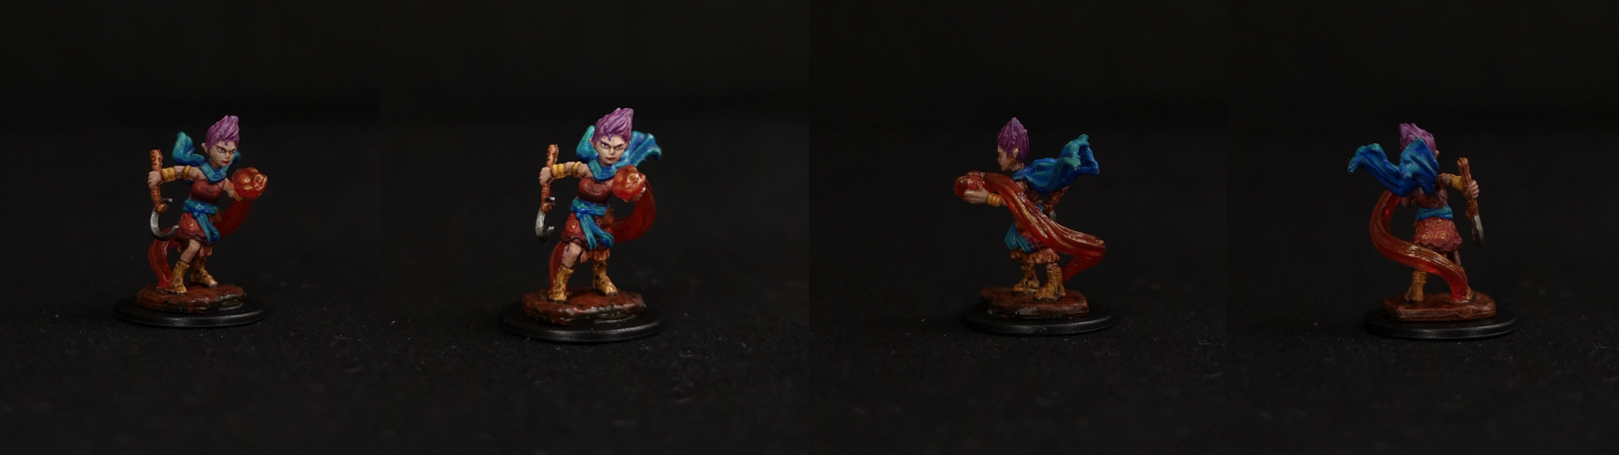 Painted with Monument Hobbies Igniters which are now out of stock, they've been upgraded to PRO Sable. Paints used are Formula P3, Vallejo, Scale75, and Citadel Contrast. I bought most of my supplies at Game State. Primer: Vallejo White. Skin: P3 Idrian Flesh (base), P3 Khardic Flesh (shadow), P3 Midlund Flesh (layer), P3 Ryn Flesh (highlight). Eyes: P3 Menoth White Highlight (base), P3 Sanguine Flesh (pupils). Hair: P3 Murderous Magenta (base), VMC Purple (layer), VMC Purple/P3 Menoth White Highlight 1:1 (highlight). Top: P3 Sanguine Base (shadow), P3 Amethyst Rose (base), P3 Skorne Red (layer), P3 Inferno Orange (glaze). Skirt: P3 Sanguine Base (shadow), P3 Skorne Red (base), P3 Inferno Orange (outer ring), P3 Heartfire (middle ring), P3 Sulfuric Yellow (inner ring). Underskirt: P3 Bloodstone (glaze). Scythe: P3 Pig Iron (blade). P3 Bloodstone (handle). Ground: P3 Bloodstone (base), VMC Smoke (wash). Boots: P3 Rucksack Tan (base), VMC Smoke (wash). Scarf/Belt: P3 Cygmar Blue Highlight (base), P3 Exile Blue (shadow), P3 Meridius Blue (layer), P3 Eldritch (highlight), P3 Eldritch/P3 Frostbite 1:1 (top highlight). Spell Effect: Citadel Contrast Blood Angels Red (base), S75 Dwarven Gold (drybrush). Arm Wraps: P3 Bloodstone/P3 Heartfire 1:1 (base), P3 Sulfuric Yellow (highlight), P3 Sanguine Base (line). If you enjoyed the article, please do consider donating your spare change on my Linktree https://linktr.ee/junebug.minis. It helps fund my art with supplies, new minis, and upskilling. Thanks for visiting, and enjoy the art!
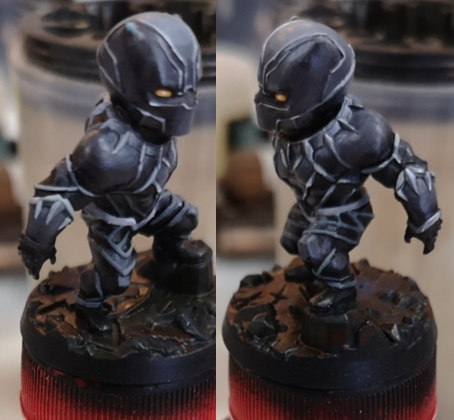
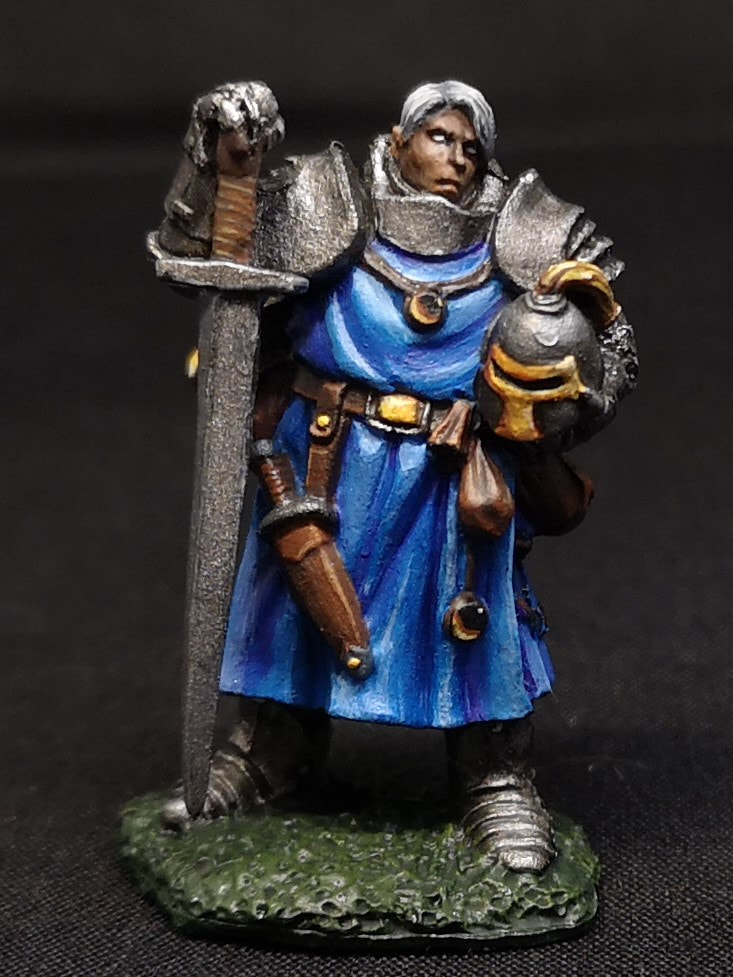
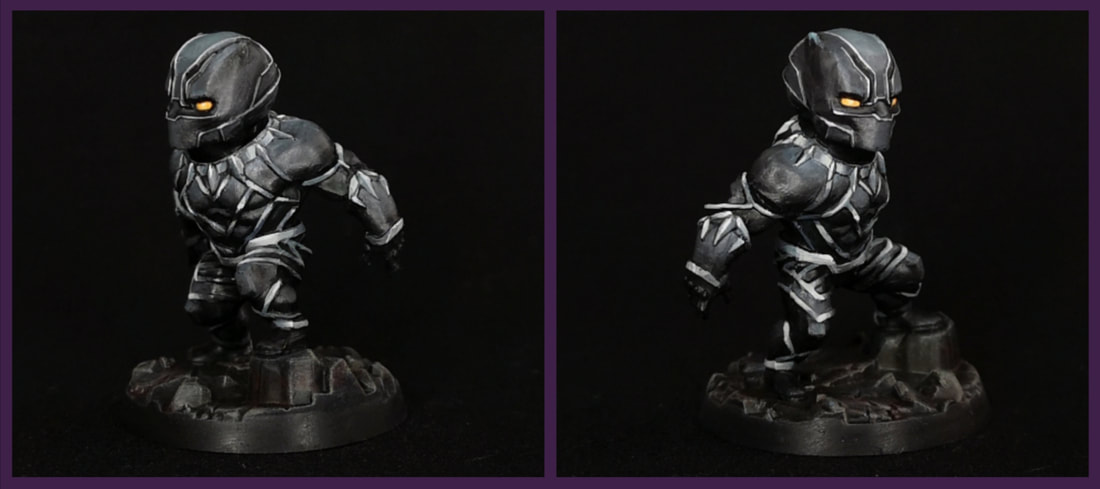 Black Panther was a challenge for me, as it was basically an exercise on how to paint different textures without being able to use colour.
Well, that's not entirely true. I'd attempted NMM before and while the minis still looked good, one couldn't really call that technique NMM. I would say that those areas still looked nicely painted, but when juxtaposed with (my attempt at) TMM, it felt a bit jarring. Maybe that's not entirely true, I think the armour on the dragons is passable, but in any case, I think I'd count Black Panther as "properly executed" NMM. 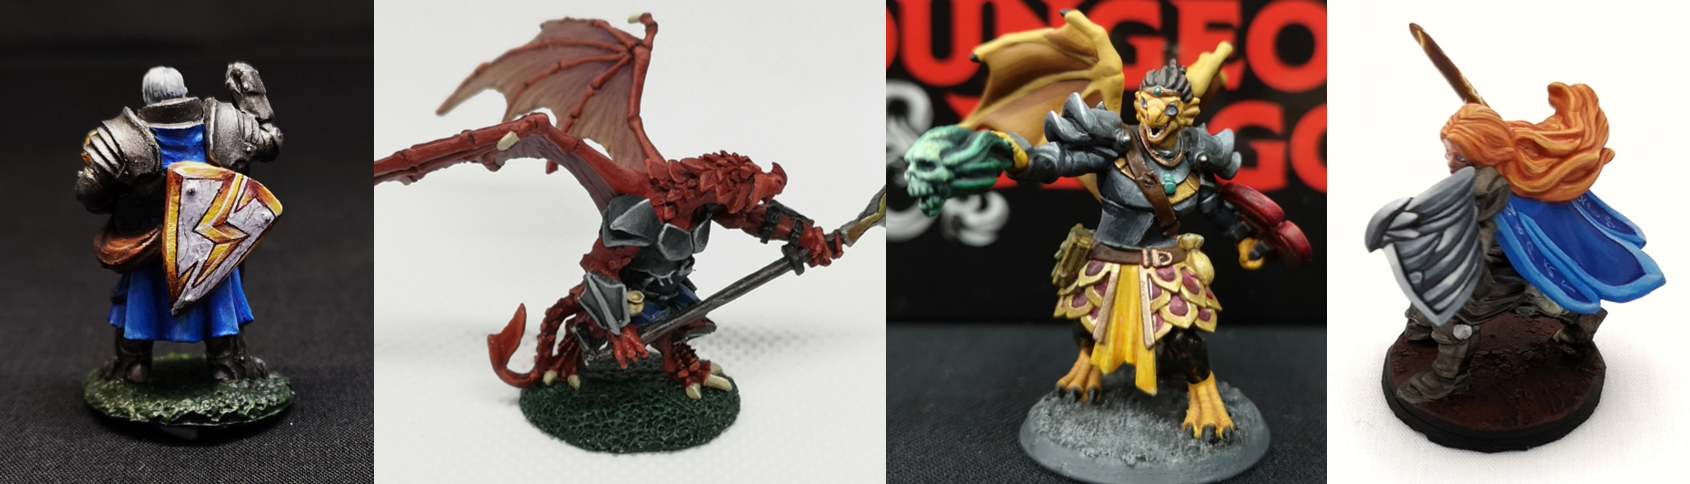 (Left to Right): Reaper (77197) Erick; Reaper (03473) Khesh Blackscale; Hero Forge Aun Tyr; Hero Forge Zonaryl (aasimar). I'm jumping a little ahead of myself. I primed BP black to start with, and I decided that since his armour was more matte than shiny metal, I would only highlight as far as a dark-ish kind of midtone. This stage went fairly quickly. I think the biggest "problem" I had here was making the blend on his head smooth, but the creamy P3 paints made that quite possible. For the base, I'd just seen a tutorial on coloured stone by a fellow painter and took some inspiration from it. I purposefully left the base very dark, as I didn't want to diminish attention on the main figure, but I used up some leftover reds, blues, and greens from my wet palette and added a little bit of variation to the stones. Finished off the base with a gentle drybrush of dark-ish grey, just to make the texture stand out a little. Moving on to the meat of the mini, I tried my best to refer to the box art by Bigchild Creatives's Hugo Gómez Briones. It helped a lot in trying to figure out where to place the reflections, but only pictures of the front were available, not the back. I also bought myself a couple of warmer greys from my FLGS, so the greys in the metal would look subtly different from the greys in the armour. I started off with his necklace, as I thought if I could get that done first, the rest of it would come more easily.
Another big learning point was how to not blend. I love blending. I absolutely love blending. If you look at Zonaryl's wing shield, all the individual "feathers" are blended nicely and smoothly, and that's the way I like it. But working on this kind of absolutely miniscule surface area, it was impossible to have such a smooth gradient and illustrate the contrast I needed to in order to sell it as metal. One of my struggles with this part was powering through the "meh", cringe-worthy phase. I knew it would look good once it was done, so I had to put aside my tripping up over the "meh" looking bits to work on the next stage of painting. I was dumbfounded by how simple the process actually was, and let out a string of excited profanities, much to the amusement of my painting companions. A friend later pointed out that it was cool how the armour greys were slightly cooler than the metal greys, and that there was a nice balance between the warm yellow eyes and bits of red in the base. I appreciated that he recognised the former (it means that my idea worked!), but the latter of these points were quite intentional. If you enjoyed the article, please do consider donating your spare change on my Linktree https://linktr.ee/junebug.minis. It helps fund my art with supplies, new minis, and upskilling. Thanks for visiting, and enjoy the art!
Tutorial originally written by Tangible Day. Full credits go to Andrew and his team, and there'll be links to more of their articles and social media if you want to check them out further!

How do you glaze miniatures? Glazing is a powerful technique for blending acrylic paint on miniatures and models. If you’re a painting wargaming models or tabletop miniatures, such as for Games Workshop Warhammer 40k or D&D minis, knowing how to glaze is a great skill to have in your back pocket. Glazing is superficially difficult, but deeply simple and satisfying once you get the hang of the technique. You can make a glaze from any model hobby paint, including those made by Citadel, Army Painter, Vallejo, or Reaper. Almost any acrylic paint will make a good glaze, because all you need to know is how to thin the paint properly and maintain good brush control.
Contents What is a glaze? Here are 3 popular acrylic polymers that you can mix with acrylic paints to make your own glaze How to glaze using acrylic paints on any surface! Here are the 9 tips for glazing miniatures with acrylic paint
In this article, I show you how to glaze miniatures easily using a simple approach. This glazing tutorial will show you how to blend two (or more) colors using simple paint thinning with water. What is a glaze?
A glaze is a paint medium that is translucent, which when applied, will allow underlying color to show through. Additionally, a glaze will act as a “filter” that changes the color and value appearance of the surface.
You can make a glaze with any paint medium, even heavy opaque colors, simply by adding a thinning media. A thinning media could be water or a clear acrylic polymer.
Here are 3 popular acrylic polymers that you can mix with acrylic paints to make your own glaze:
Each of these polymers work great as glaze mediums that you can add to your acrylic model paints. For example, if you’re looking for a way to make a Citadel, Vallejo, or Army Painter glaze, simply add a drop of Golden Glaze Liquid Satin with a touch of water to thin out the pigments. You want your paint+glaze medium mixture to be translucent so color doesn’t cover up a surface in a single layer. Adding a bit of water helps the glaze mixture flow off your brush easier. Of course, every additive medium you mix with your model paints will have a slightly different effect. Although I’ve tried numerous mediums in my hobby work and have my preferences, you’ll want to experiment for yourself to know what you like. Some mediums, for example, are thicker gels that require a bit more work with your brush to use properly. Other glazing acrylic mediums have a soapy, lubricant feel to them, which may overly thin your paints (e.g., you have less control). Bottomline: Play with your paints to know what you like for your own miniature painting work. As you see below, I kept this tutorial simple and use water only as my thinning medium to create glazes. In fact, for new painters, I highly recommend you try and use only water until you understand how your paints behave in their primary formulation (i.e., most hobby acrylic paints are water-based formulas). How to glaze using acrylic paints on any surface!
You can watch my video tutorial above, or keep reading below to see how to use glazes on miniatures and models.
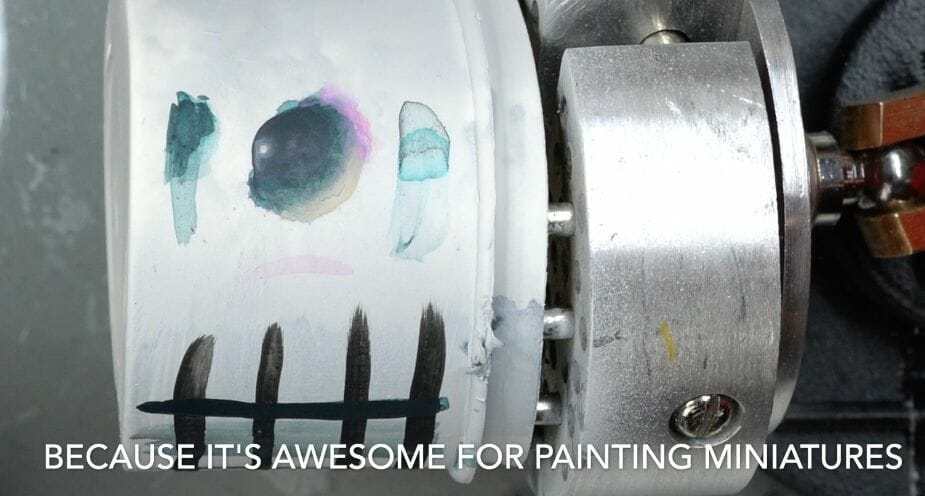
For this how to glaze miniatures tutorial, I use the old cap of a spray can. To demonstrate what a glaze is, I also use this surface as a way to show you what a “glaze” looks like compared to a “base coat or layer” of paint.
Here are the 9 tips for glazing miniatures with acrylic paint:
1. Prime your surface
Always start with a suitably prepared surface. This means using a good primer applied in an even coat.
The best way to apply a primer is to spray it on. You can use aerosol primers or an airbrush, which can help you with the powerful technique of zenithal highlighting. For this glazing example, I primed with Vallejo Grey Primer Acrylic Polyurethane, one of my favorite surface primers. I applied it with an even airbrush coat using my Badger Patriot 105 airbrush. 
I primed this spray cap with Vallejo Surface Primer.
2. Paint your model with your basecoat colors
For an example, I paint dark lines to represent underlying color on a model.
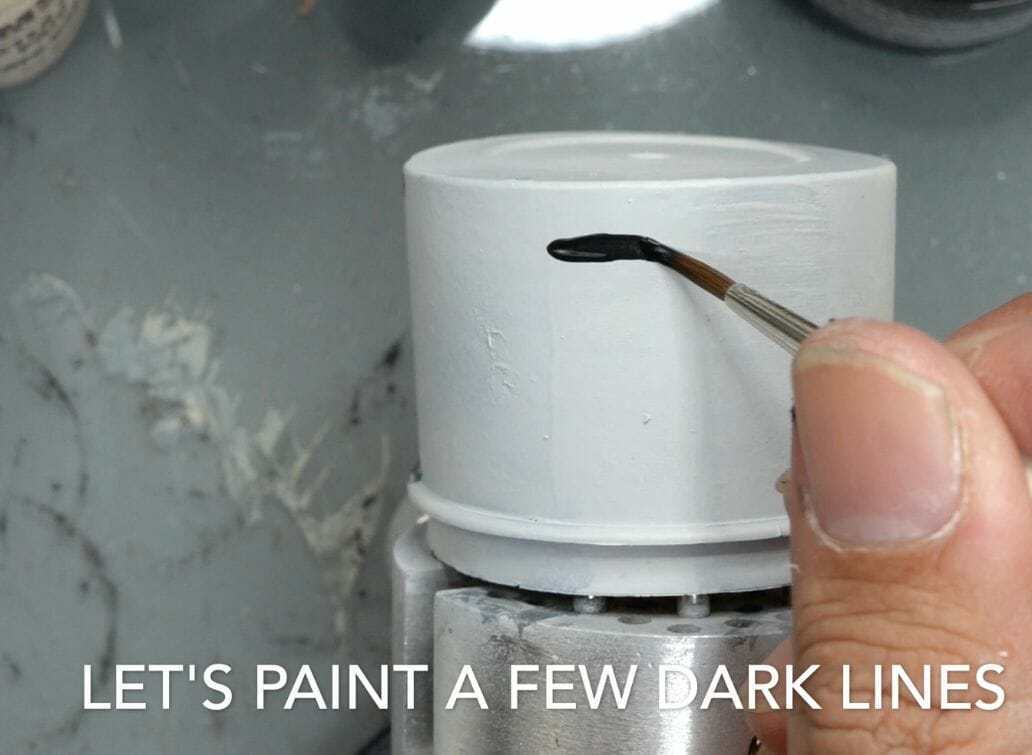
I use dark lines as a way to show you how glazes and basecoat layers of paint differ.
These dark lines may represent details or other patterns, as well, that you want to color filter with a glaze. 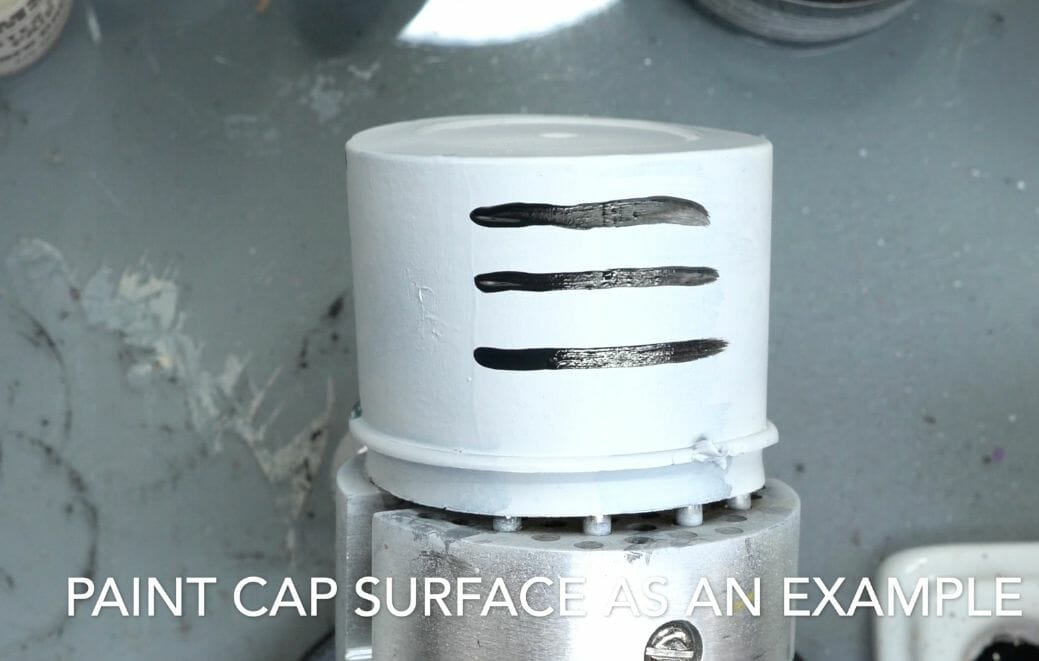
For normal basecoats, you want to apply paint that is fairly opaque paint. This means using paint that is fairly pure directly from the bottle or pot. In this case, I use Vallejo Model Color Dark Sea Blue.
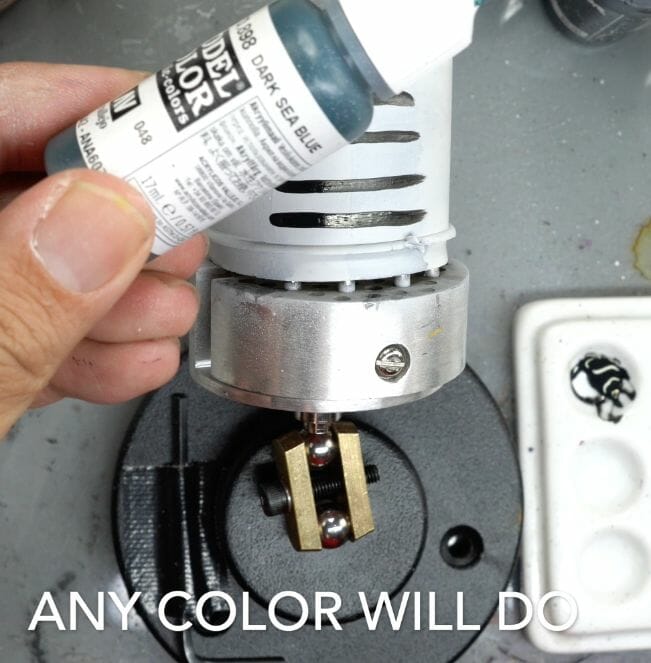
The technique of glazing will work with any color paint you like to use.
Depositing the paint directly into my ceramic palette, I can see already that it will have great coverage in 1-2 layers. 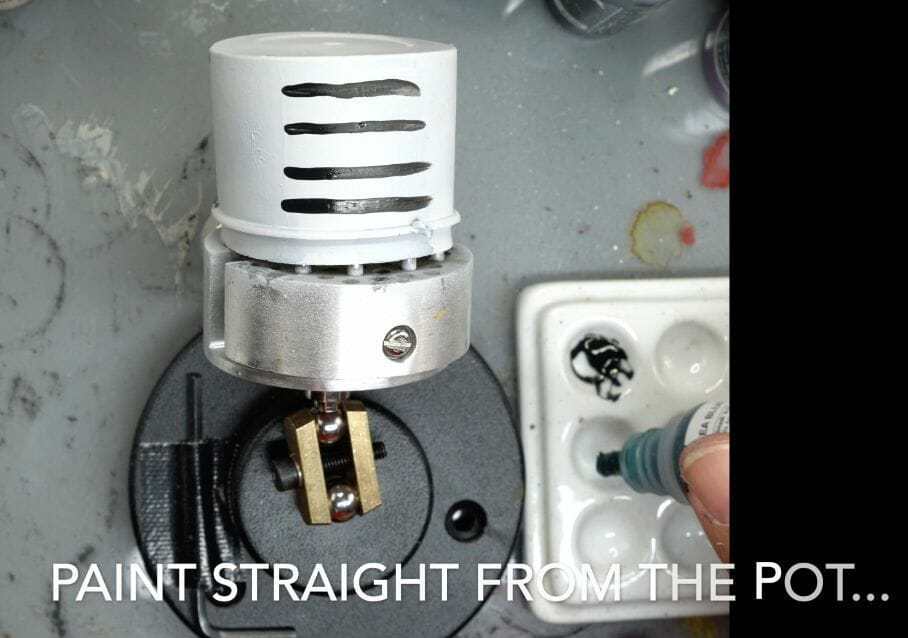
For a base coat paint layer, use paint straight from the pot or bottle. You may to thin a little with water to help the paint flow off the paint brush. But, don’t add too much for thinning paint used for base coating or layering.
Using paint straight from the pot is great way to save time. I prefer using paint as thick as possible to avoid having to layer on paint over a surface over and over to avoid splotchy results. Of course, there’s a balance. Make sure your paint is thin enough that allows you to brush it on evenly and predictably. You don’t want your paint to look like a heavy “paste” on your model’s surface. 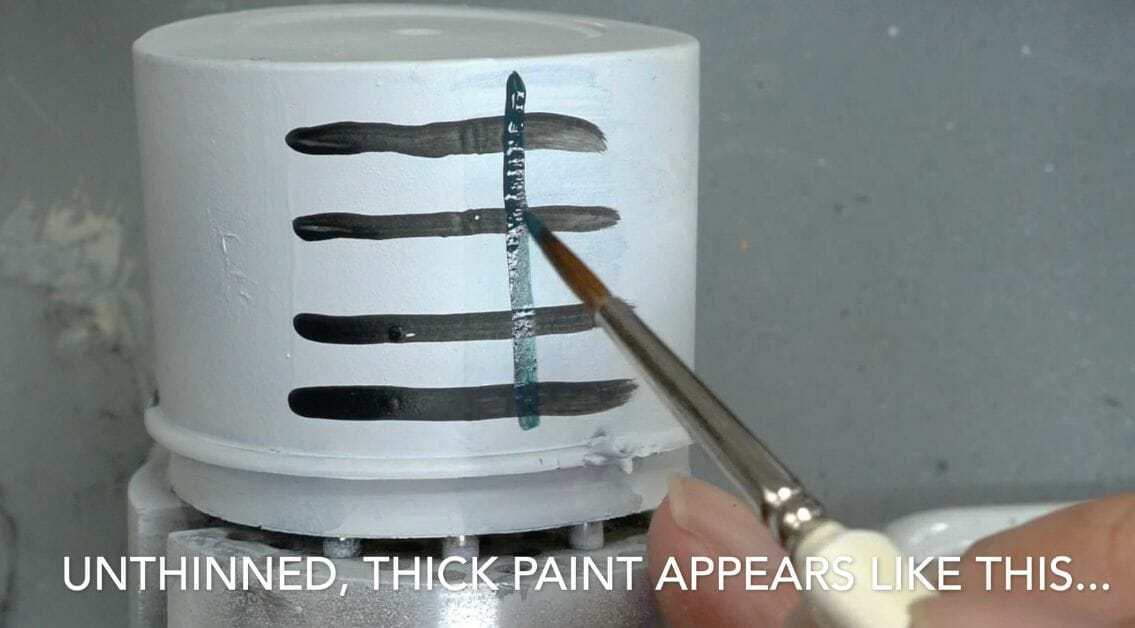
A base coat layer of paint should cover underlying surfaces pretty well.
A good base coat paint will cover a surface in 1-3 layers. More importantly, the paint will be predictable and won’t build up unevenly. You want an even coat no matter what thickness of paint you use in your first few base coat layers. You’re building house, metaphorically, so make sure your foundation is good and solid. 
The black stripes are covered by this base coat layer.
If you look at the images above (and below) of the base coat layer, you can see how the paint covers the horizontal black stripes. This is how a “base coat” or “foundation” paint should behave. A layer-type paint will also have the same effect, but may require a few more layers for solid color coverage. You’ll see in a moment why I bring this point up when we compare this paint to a glaze. 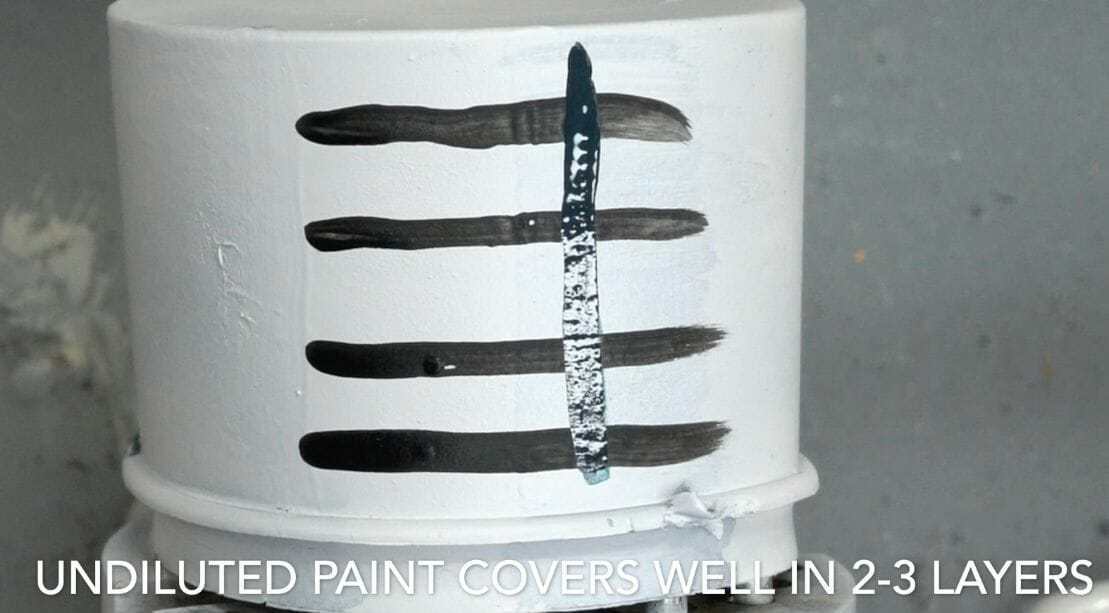
It should only take 2-3 layers to completely cover a surface with a base coat of paint.
3. Make a glaze with water and paint
To make a glaze, all you need to do is thin your paint until the pigments spread out enough for you to “see through the color”. The amount of water doesn’t really matter. Add enough water to thin the paint until you can see the underlying surface through the thinned, paint glaze.
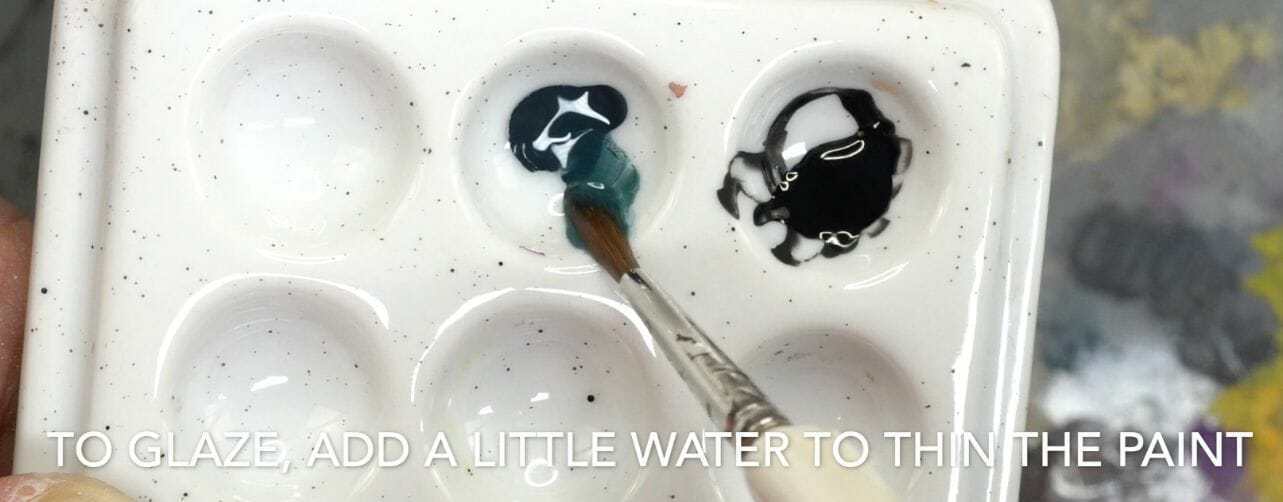
I prefer using water most of the time to thin paints into glazes.
You’ll notice at some point after adding water that the glaze mixture becomes “runny”. This is okay. That’s a natural effect of paint thinning. Making a glaze with water is effective because it is simple. If you want more control over your glaze, you will have to add a “glaze medium”, such a clear acrylic polymer (see here). 
Thin the paint until the pigments spread out and the color becomes transparent. The surface underneath should show through.
To keep control over your thinned glaze, I recommend that you wipe off any excess moisture from the brush before you apply it to the model. If you don’t, you’ll get drips and runny glaze over areas of your model’s surface you don’t want the glaze to go. 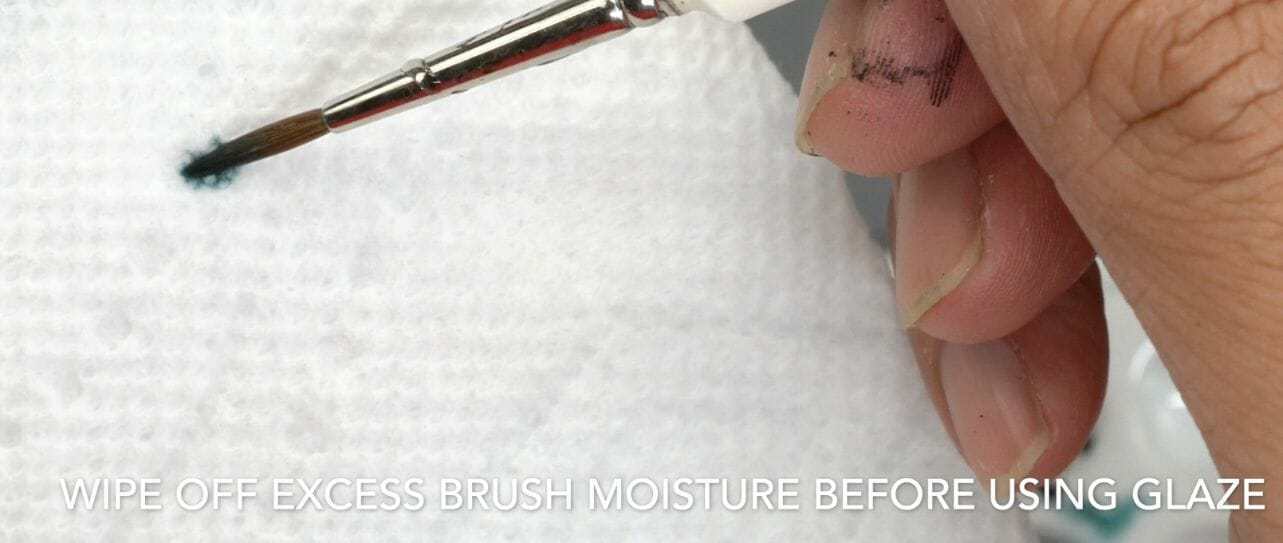
To maintain brush control, you’ll want to remove excess moisture from the brush. You don’t want your glaze to from droplets on your model’s surface.
4. Apply your glaze with constant brush pressure for a smooth coat
Your brush pressure controls how much glaze color deposits on your model’s surface. The relationship is inverted: More brush pressure equates to less paint deposit.
If you can remember this axiom, you’ll internalize a key aspect of how controlling your brush also allows you to force paint to behave on any surface. A master painter doesn’t even have to think about how his brush works… but, if you’re a mere mortal like me, then all you need to do is go back to this idea. Brush pressure directly affects the amount of paint applied to a miniature. 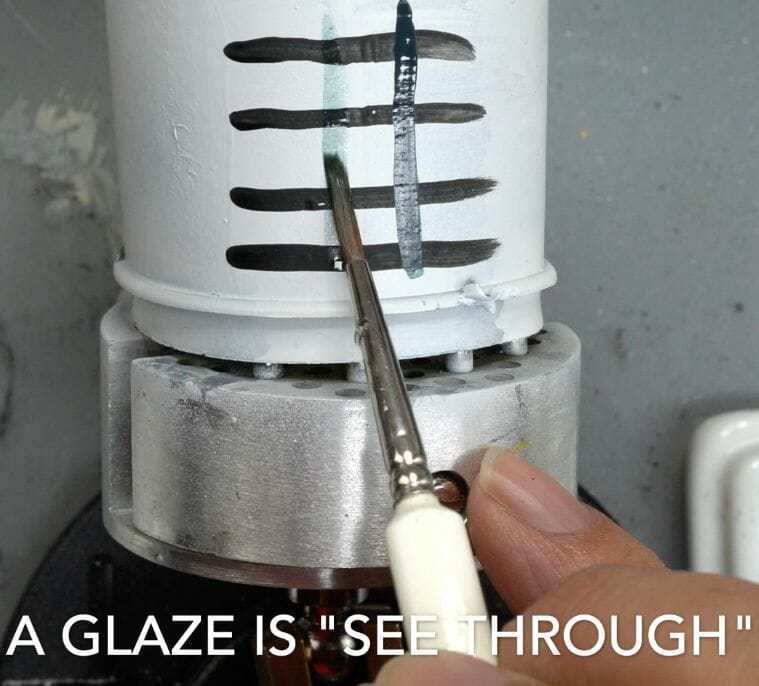
A proper glaze (thinned paint with water) should still show the underlying surface. Notice how the glaze also “tints” the surface with the paint color.
So if you want an even coat for your glaze, keep your brush pressure constant during the brush stroke. If you reduce the pressure on the brush, more paint glaze will come off at that point where your brush lifts up. 5. Add additional glaze layers for more color coverage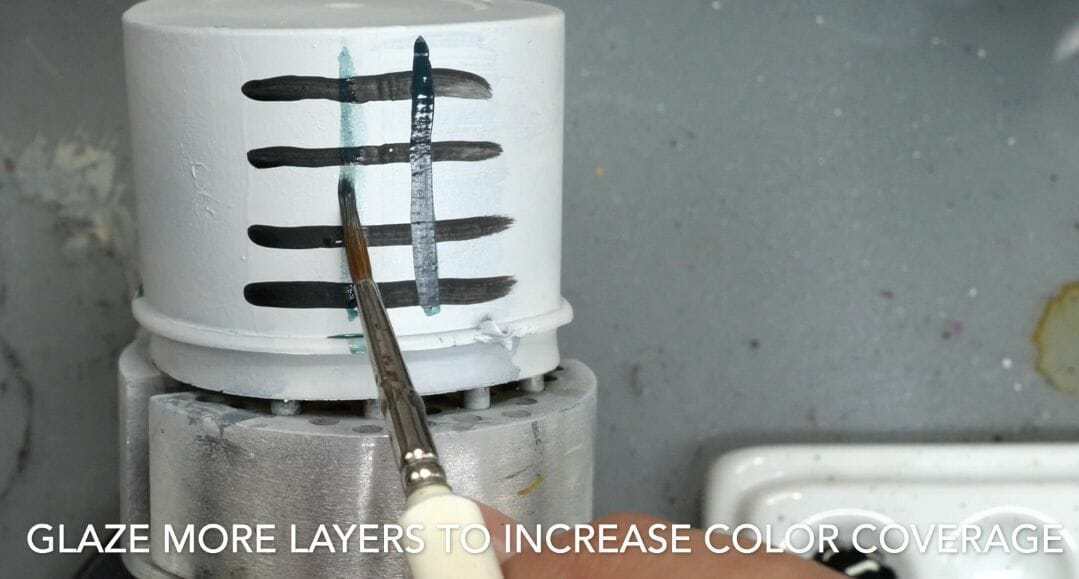
If you want more color coverage with your glaze, merely add more glaze layers on top. But, make sure to allow each previous layer to dry first.
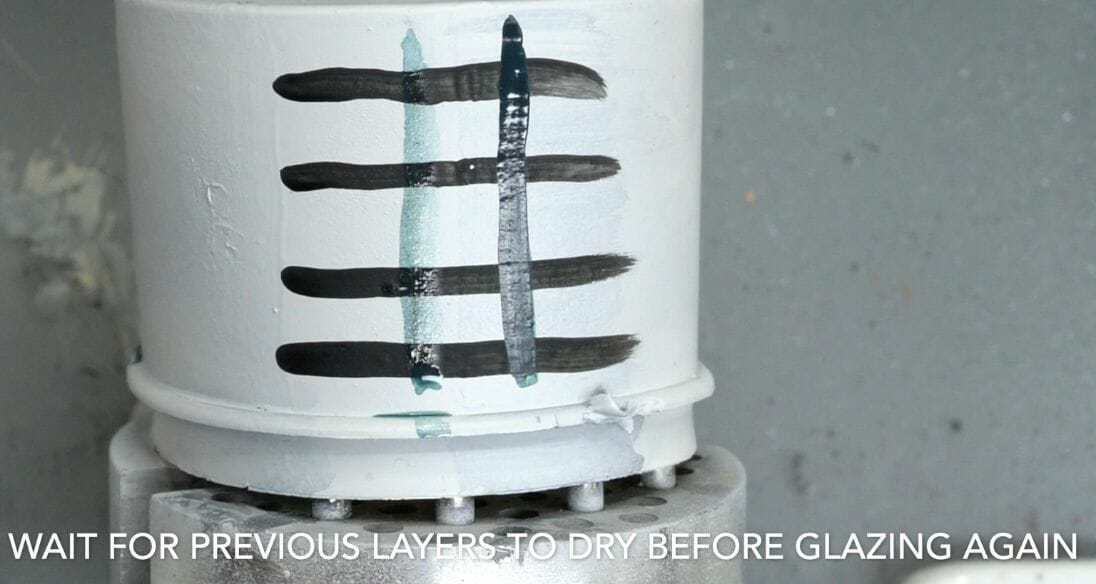
Allowing each previous glaze to dry will give you more consistent results. Additionally, you’ll see the accurate changes you’re making to the overall color of the glazed surface as you add more paint.
6. Create color gradients by layering glazes
To add more color using a glaze, make sure to allow the previous glaze layer to dry. Then, simply glaze over the same area. As pigment deposits, more color will appear and cover the underlying surface.
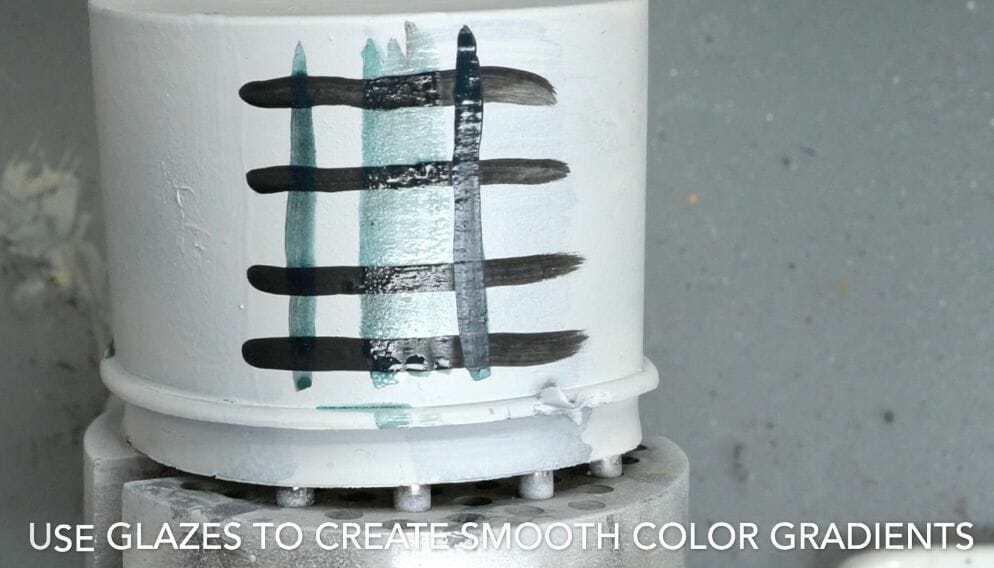
Glazing is a powerful way to create smooth color gradients. You have a lot of control over how your paint looks when you glaze it on. Of course, this is a slow process, but it is “tried and true”.
You can use this glaze “layering” technique to create color gradients of increasing/decreasing coverage. If you’re savvy, you’ll already have discovered the significance of this simple, but powerful technique with glazes. 7. Use glazes to blend two (or more) colors
The ability to blend two or more colors together with a smooth transition using glazes is indispensable. You can paint almost any miniature with professional results if you understand how to use glazes with your acrylic paints. The smooth, buttery blends you see in a lot of fine-art level model painting were created by glazing paint.

You can use glazes to blend two different color layers together with a smooth transition.
To start blending two color layers together, make sure to create solid basecoat “blocks” of color. Using a solid foundation of color helps sell the effect later when you blend the paints together. Remember, you need to wait for each layer to dry before adding the next. We are not wet-blending (more about the wet-blending technique here). 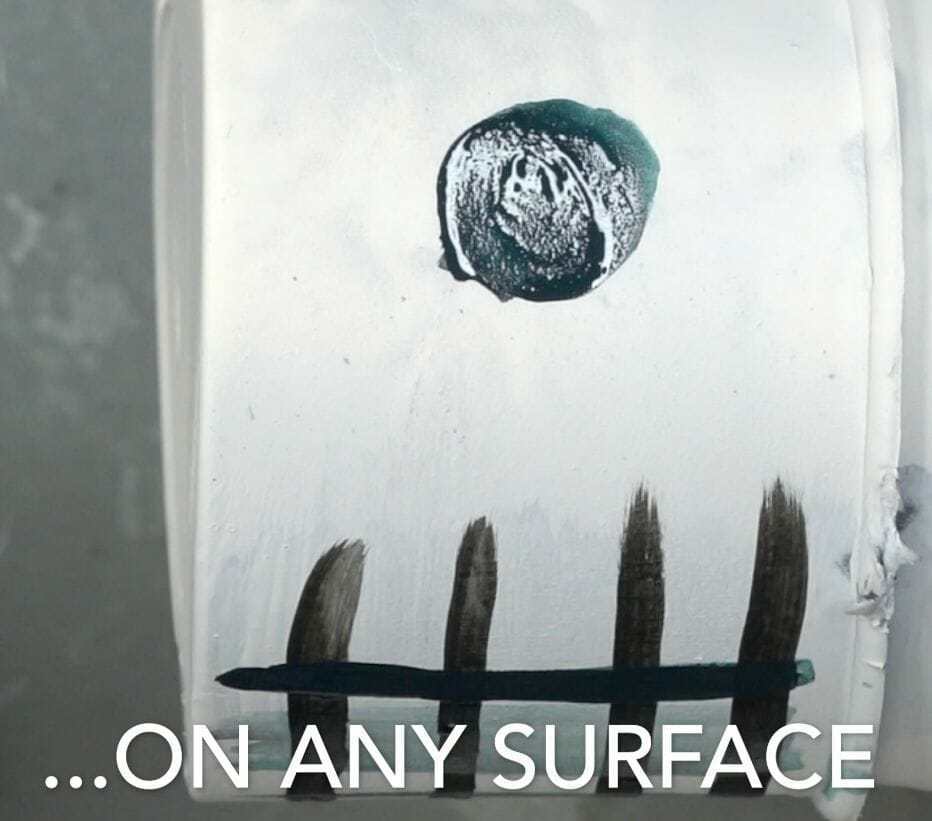
And, glazes are great for almost any surface because you have room to make mistakes (the paint is very thin).
You can use a hair dryer to speed up the drying process. I recommend that any serious miniature painter get a hair dryer. It doesn’t need to be expensive. I use an affordable Conair brand blow dryer that sits next to me at my desk. The same hair dryer has lasted me years. 
Using a hair dryer will speed up paint drying, which helps you paint faster overall.
Make sure you use the lowest heat setting on your hair dryer and keep a safe distance when drying paint that is clearly puddly wet. Otherwise, you risk blowing the paint into unwanted areas of your model. 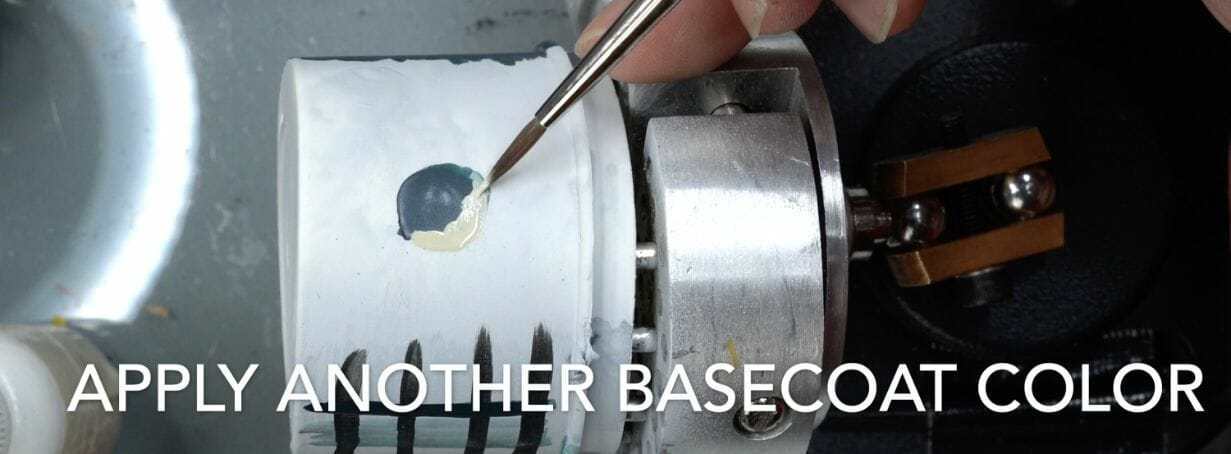
Apply your second base color that you eventually want to blend.
When you add other color basecoats, make sure you do so in blocks of good, even coverage. This will make it easier for you to see the delineation between your two colors, which allows you to glaze the transition more effectively. 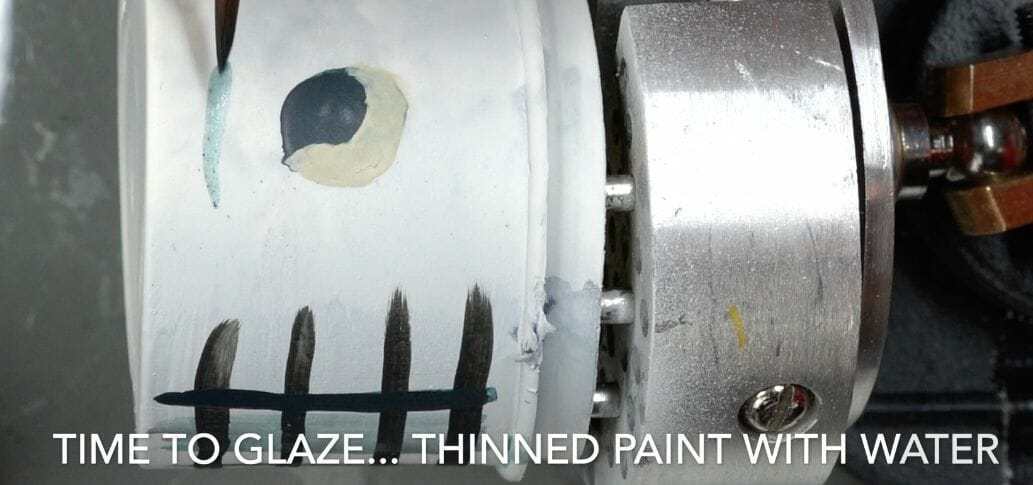
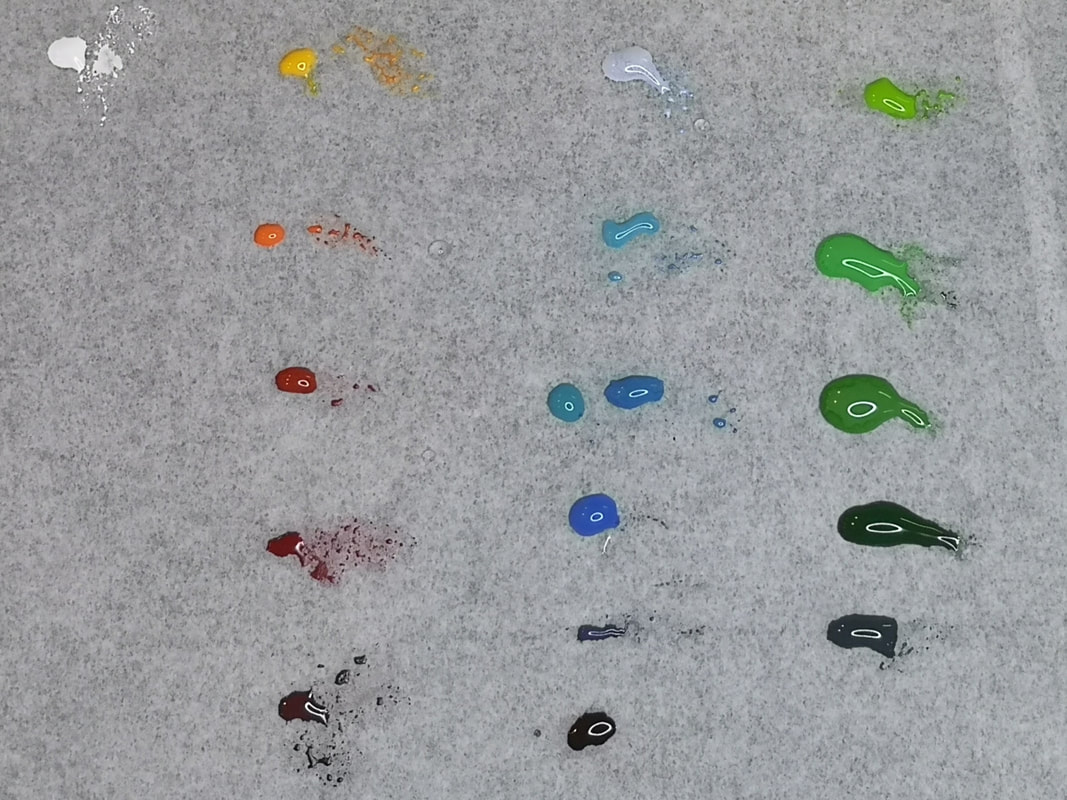
Thin your paint with water until it is transparent. This glaze transparency (shown here) is exactly what you should aim for when thinning your acrylic paints into glazes.
8. Thin your paint with water (or glaze medium)
I don’t use a wet palette for glazing. A wet palette doesn’t give you the control that a dry palette does. Here are other really good reasons for why you need a dry palette for painting miniatures and models.
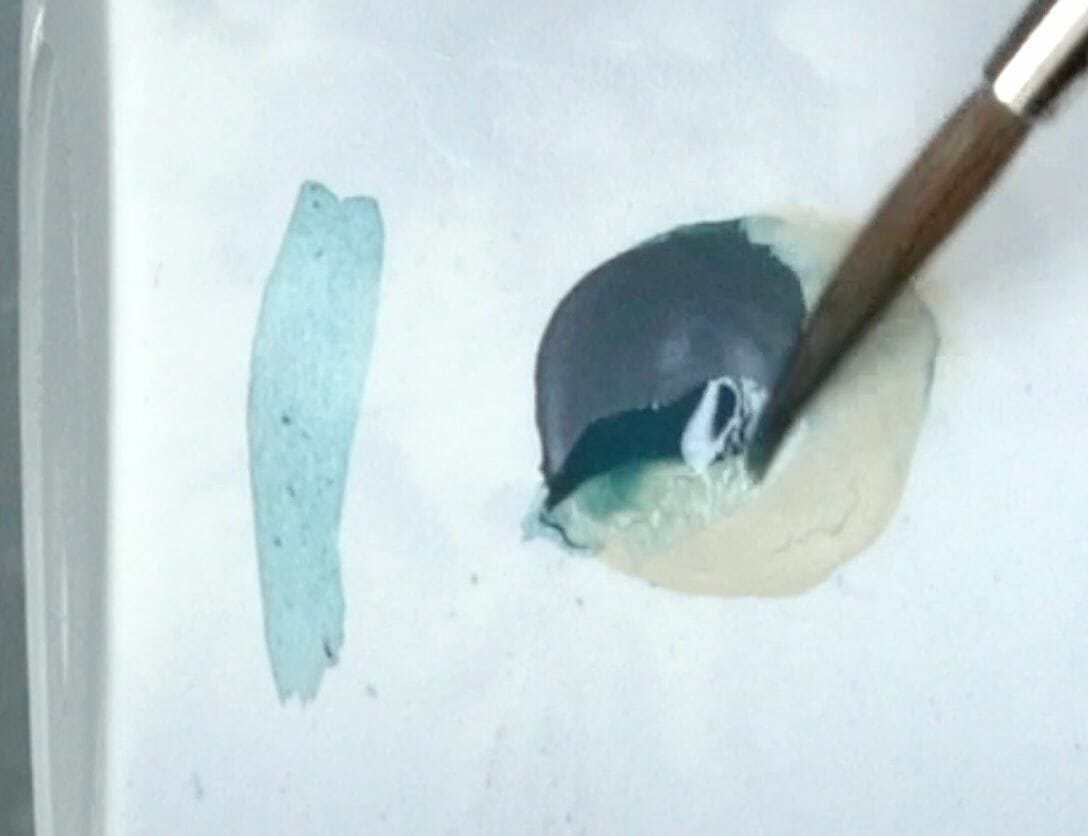
Notice the glaze on the left. It is a thinned paint mixed with water. When applied over the interface between two basecoat colors, a glaze like this helps “blur” the line.
What you are trying to do with the glaze is “blur the line” between two colors. A good glaze will be transparent. It will allow you to see the underlying surface, while tinting the appearance. Use this to your advantage. To “blur the line” between two basecoat colors, apply a glaze over the area you want to blend together. 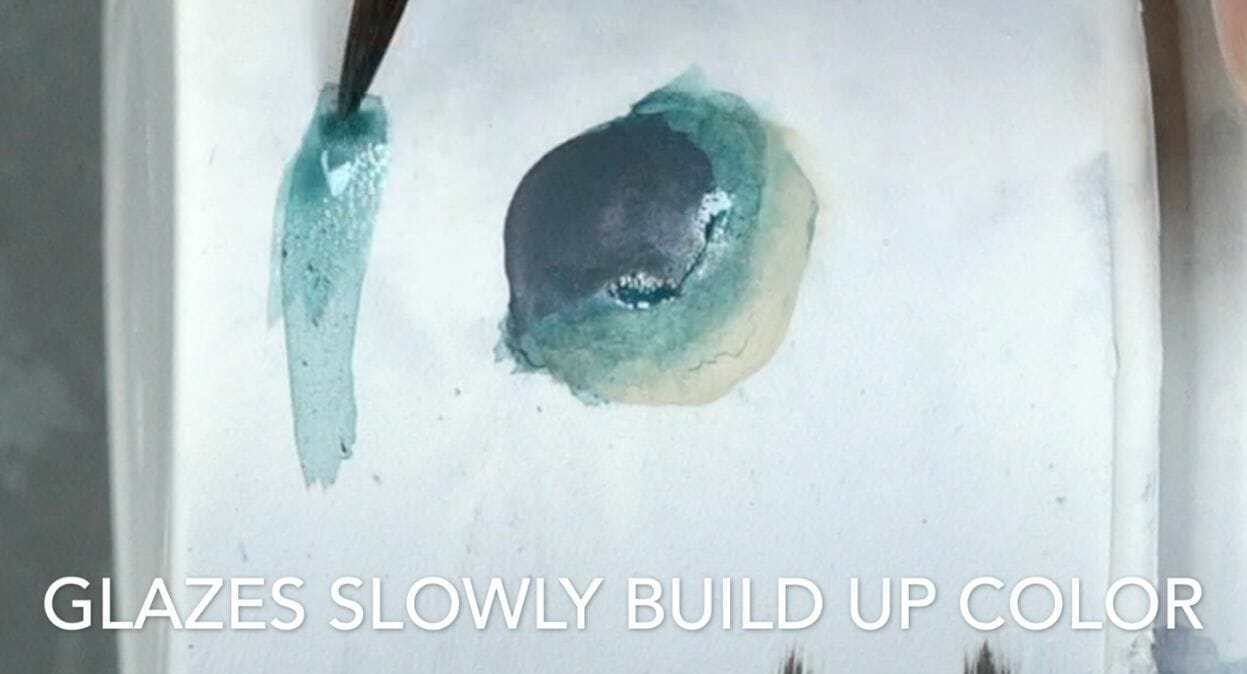
Glazes work well by helping you slowly build up color in a controlled fashion.
I like starting a glaze with the darker color first. To apply the glaze, keep in mind that brush pressure determines where the paint will deposit most. Light pressure at the end of a brush stroke will create the heaviest deposit of paint. 
In this fashion, you can use the direction of your brush stroke to “push” paint pigments of a glaze where you want them to go! In combination with subsequent glaze layers, you can create the slow gradient build-up of pigment between two basecoat layers. This is blending with glazes. 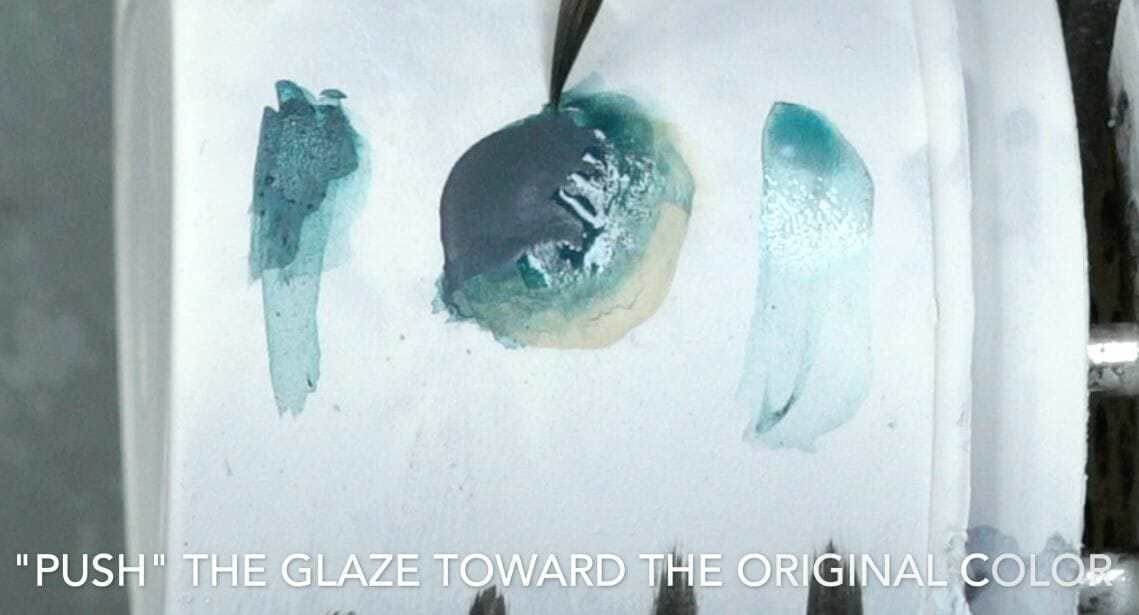
Using your brush stroke direction to “push” the glazing paint where you want it to go.
9. Glaze repeatedly, allowing each glaze layer to dry before adding the next
You can continually add glazes over glazes until you’re happy with the result. Push pigments into areas where you want them to go. Make sure excess moisture is wicked off your brush for the best control over your glaze-paint. A pro tip I learned is to use a brushstroke toward the direction of the original color.
For example, if you’re glazing with a dark color paint (the shadow), then your brush stroke should go toward the shadow areas of your model (away from the highlight color). 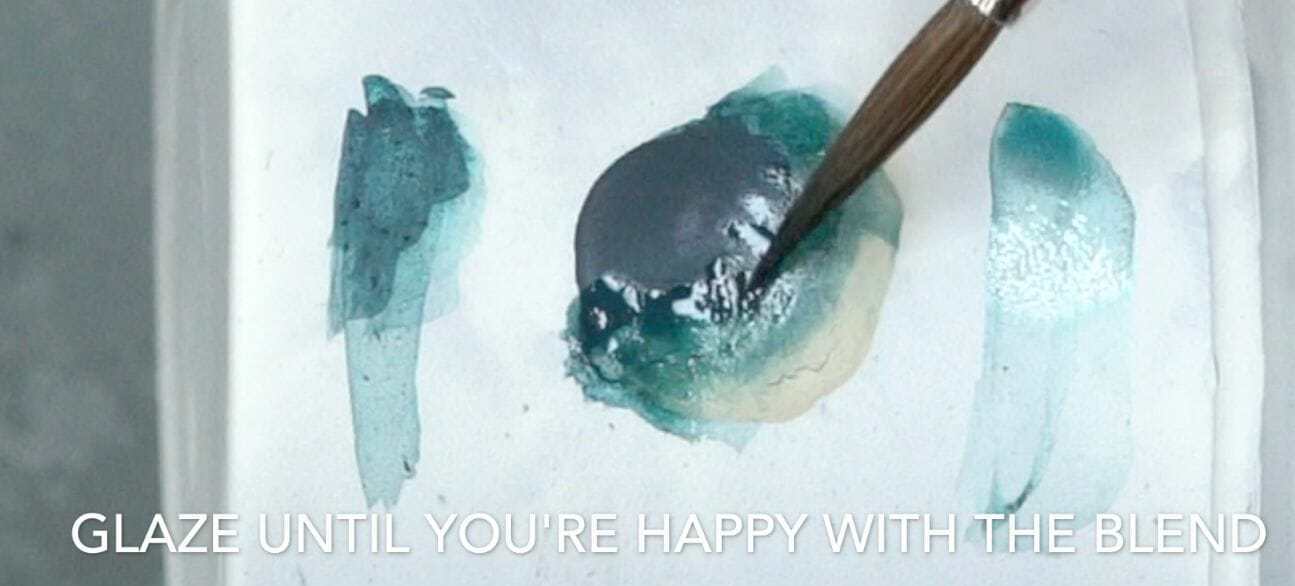
Keep adding glazes over the transition zone (where two colors meet) to blend the paint colors together. Remember to wait for each previous layer to dry before adding the next glaze layer. Use a hair dryer to speed up the process of layering the glaze.
10. Add a tie-in color (also known as an “accent” glaze)
To really sell the effect of a smooth blend between colors, try adding an “accent” color as a glaze. In this case, I had a cool bluish shadow color, so I wanted something a tad warmer. I chose pink and made a glaze by adding water to the pink model color paint.
Apply the accent glaze into the mid-tone area. Slowly build up the color to give your surface a subtle “hint” of a different color in this space. 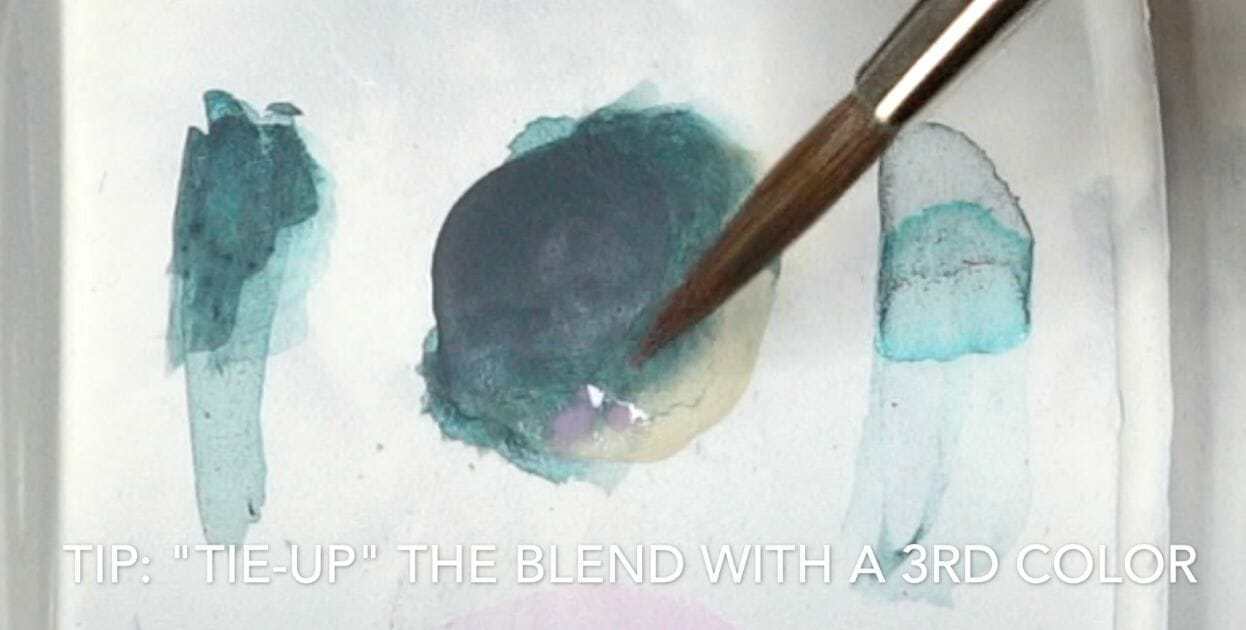
To really sell the blending effect and ceate a smooth looking transition, consider using a 3rd accent color. Apply this color in the midtone area as a glaze.
This accent color acts to trick the eye further into believing the smoothness of the gradient between your original basecoat colors. This third accent color enhances the “smooth” blend illusion of your glazing. 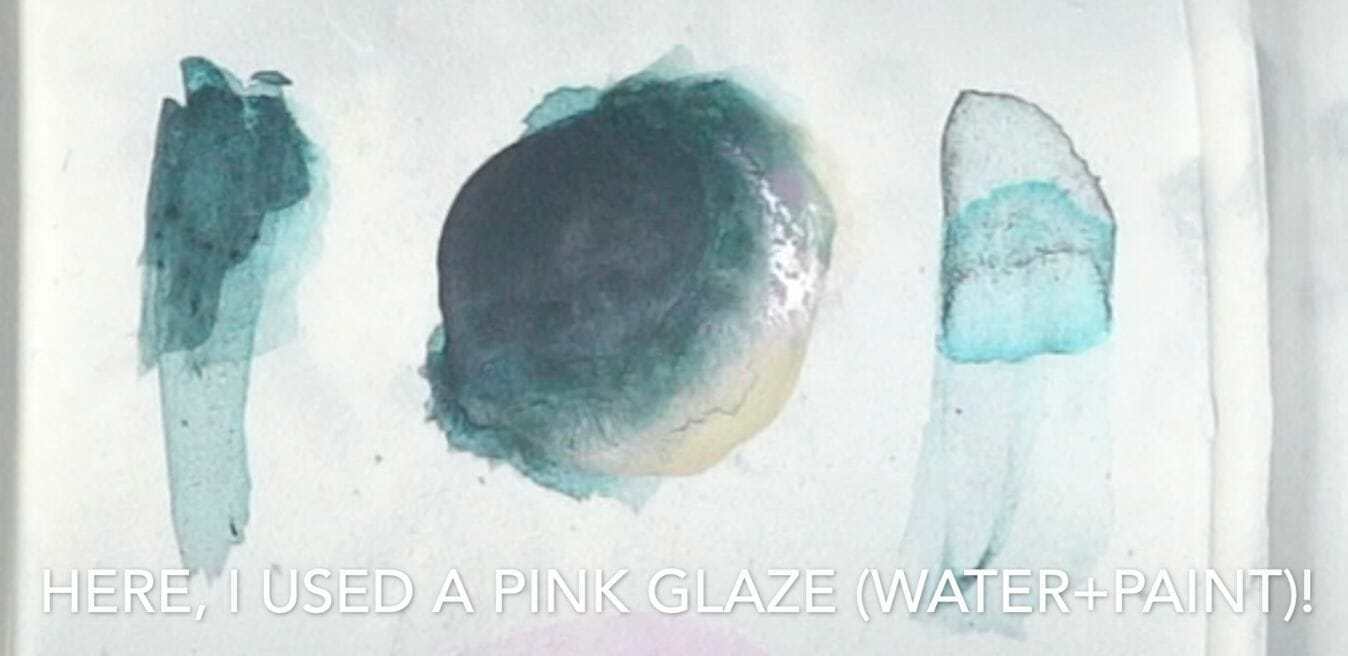
I used a pink glaze (made with paint + water). You can use whatever color you like for this accent tone. I do recommend you try using an accent color that contrasts with your shadow color tone.
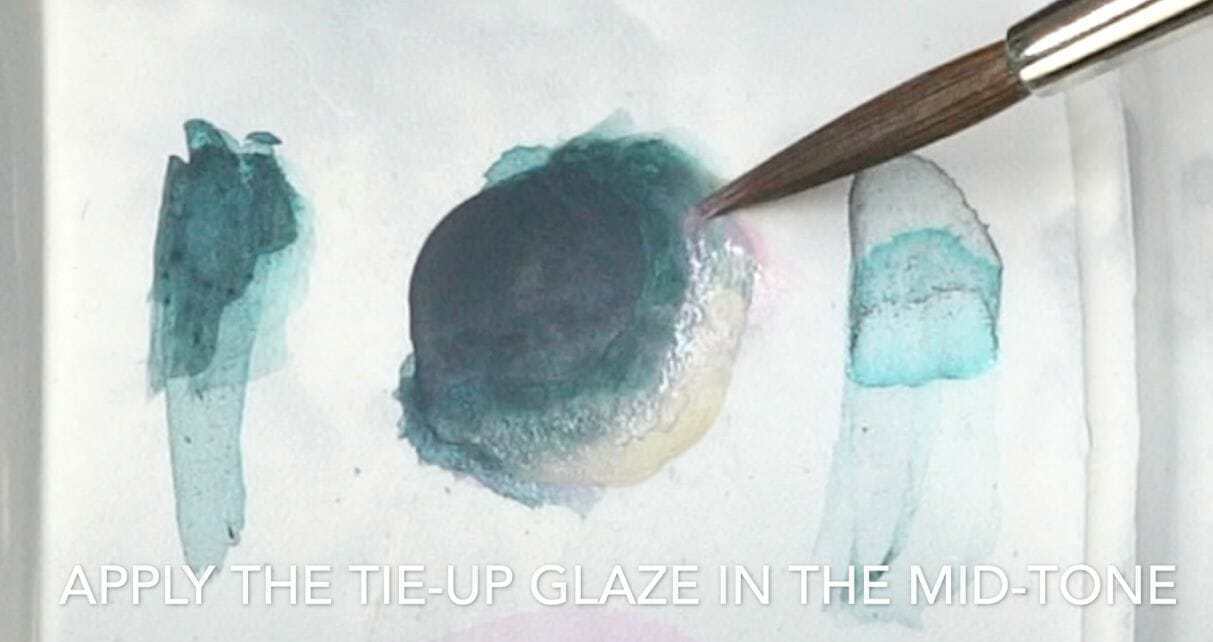
Build up the accent glaze slowly. You don’t need a lot, just a subtle hint of this 3rd color.
You can glaze for hours using the technique. Ultimately, it comes down to how smooth you want your color blends to look and how much time you want to invest. 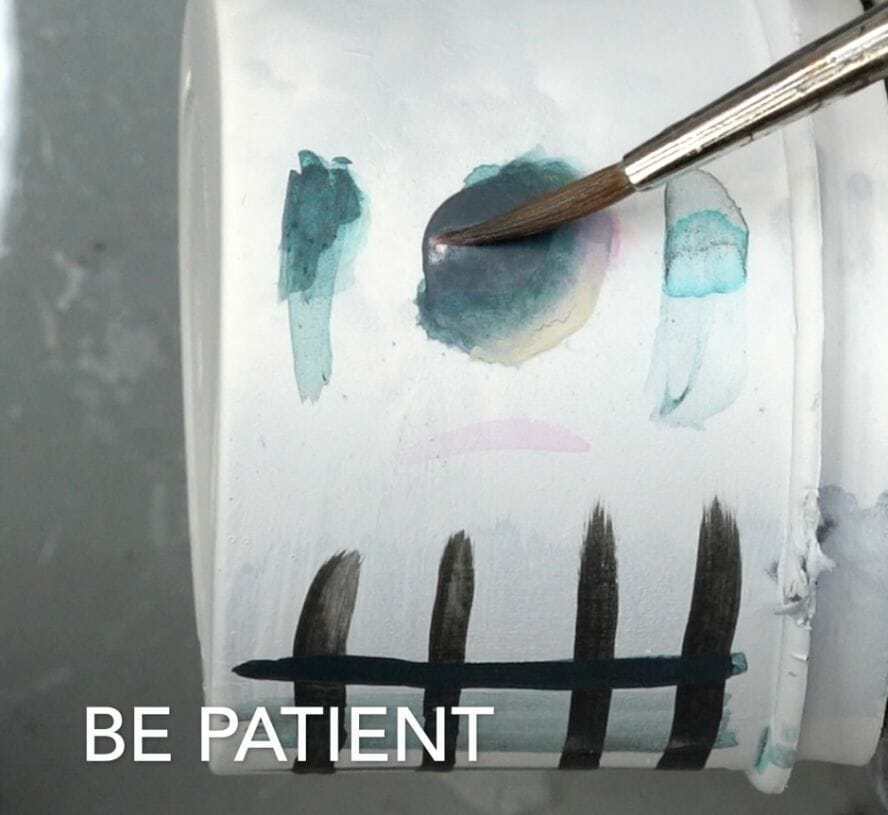
Glazing is a gradual process. Be patient.
The results you can achieve with glazing on miniatures is amazing. Take your time and study how the paint behaves. Look at how subtle changes in color work with glazes. Leverage this technique to your advantage.
The results you can achieve with glazing are pretty amazing with a bit of patience and perseverance. When you’re good at glazing, you can combine it into other blending techniques, e.g., layering and glazing, zenithal highlight painting, and much more. Glazing is also helpful for painting special effects in miniatures, such as painting object source lighting (OSL) and for painting gems. Here is a final example of what you can do when you combine “layering” with “glazing”. To see how this is done, see this article about using layering and glazing to paint the non-metallic metal (NMM) effect. 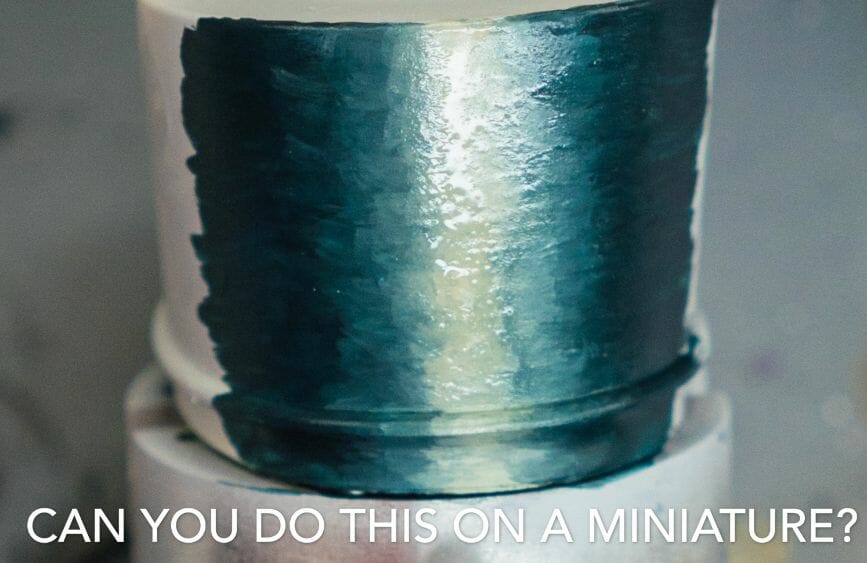
Here’s another example of what you can do with glazing.
Conclusion
I hope you found this glazing tutorial helpful! Glazing is one of many paint blending techniques you can use on scale miniatures and models. If you’re looking for more articles about how to paint miniatures, check here. As always, if you have any comments or feedback, I’d love to hear from you.
Stay tuned to see how I use glazing and other techniques to paint tabletop gaming miniatures and more! If you’d like to see some of my work, check out the painting gallery. Happy painting (and glazing)! If you enjoyed this tutorial, check out Tangible Day on Twitter, Instagram, and Facebook. 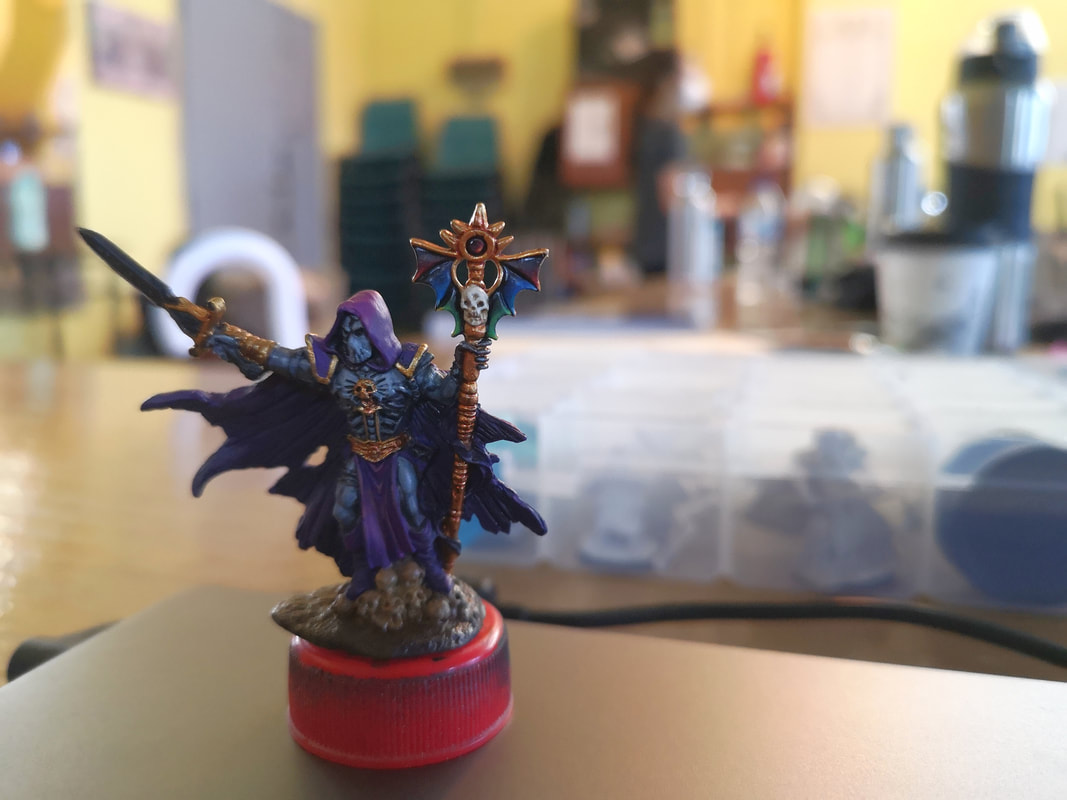 Gem effects are a great way to depict a reflective surface like a polished gemstone, or even for flat surfaces like goggle lenses. It's a great little technique to give your painting another level of detail and the high level of contrast sells the illusion that you've painted a super reflective item. My task on this "Skeletor" mini was to embed the staff with jewels. My previous experiment (inks over a silver base) was quite a failure, so I had a couple of options at my disposal. Citadel has a line of gemstone paints (Spiritstone Red, Soulstone Blue, and Waystone Green), which turn out best when painted over a bright silver base - this was what I was trying to achieve with my inks. They dry very glossy and give the effect of a shiny bead. This was Option 1. However, I thought back to gem effects that were instead achieved with "normal" paints, which looked like a gem because of how you apply light and shadows to sell the reflections. This was a little more appealing to my perfectionist side, so this is what I decided on in the end.
How to paint a simple round gem:
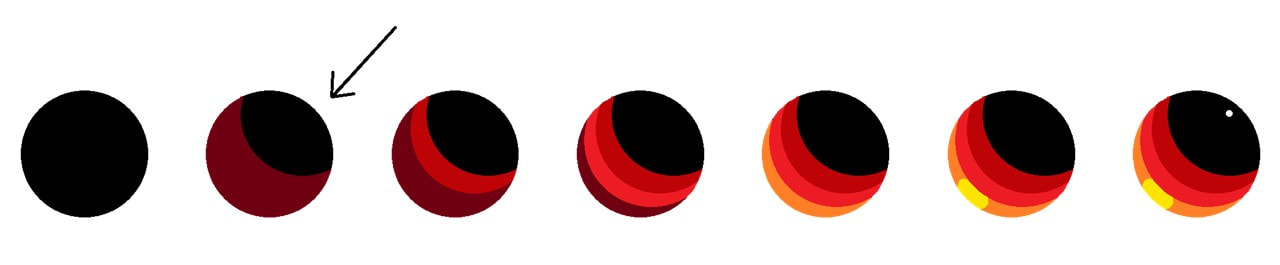 As I was putting together this little sequence in PowerPoint, it previewed the final gem when the colours were changed, and I think this is a good visualisation of how different colour gems look like. 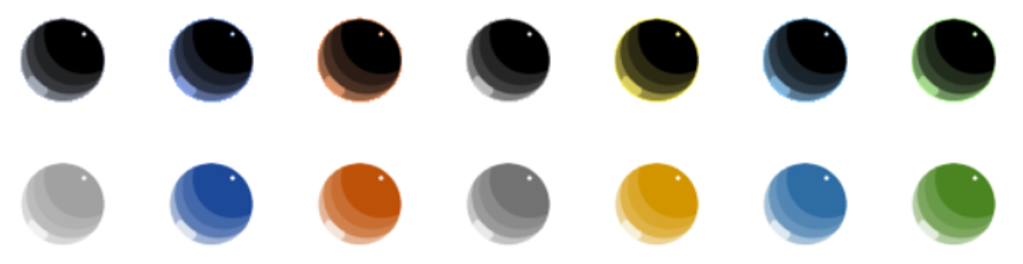 For my wings recipe specifically:
If you enjoyed the article, please do consider donating your spare change on my Linktree https://linktr.ee/junebug.minis. It helps fund my art with supplies, new minis, and upskilling. Thanks for visiting, and enjoy the art!
A fellow painter was giving me feedback on a WIP the other day, and he mentioned that the highlights were the colour of light, and the shadows were the colour of the environment. At the time, it kiiiiiiiind of made sense, but the more I thought about it, the more I realised that it had the potential to elevate my painting to another level. I needed to start thinking about the figure not as an isolated "portrait," but as a whole piece of art. Highlights are the colour of light, shadows are the colour of the environment. This statement made me think about something cool I'd noticed several months ago, whilst on my way to the game shop where I paint. One of the crossings has lights on the floor of the pavement, to let pedestrians with their noses in their phones know when to cross. These lights are actually really strong, so much so that they lit up the underneath of the leaves of the trees above us. Holding my hand out, I noticed how, where the shadows would normally just be a darker gradient of skin tone, they were a vivid red. In the areas that would be darkest, the red was brightest, as if coming from another light source. On the side of my hand, at the transition between shadow and light, the "shadow" was instead red light. And as soon as I'd noticed it, I was snapped back to reality by the red light turning green.
This is certainly a very strong example, but the principle applies even when there isn't a specific light source in the environment. Mere proximity to a coloured surface will tint your shadows, the effect will just be much less obvious because it's not directly from a light source, but reflected off the coloured surface. On small minis, this is almost negligible because it's simply not visible to most people, and usually not worth the effort unless you want to achieve competition level. But on larger minis and on dioramas, accounting for environmental light is much more important. Different materials also reflect light in different ways. Skin is matte and has very smooth gradients, and you can smoothly blend in the highlights and shadows. In contrast, metal is much more reflective, and the transitions between light and dark will be sharper. Metal will also reflect environmental colours more strongly than skin. In the example above, the purple on her right thigh is stronger than on her left hand, partly because her hand is further away, but also because skin is less reflective. I suppose that this also clarifies the thought process around object source lighting (OSL). It's easy to place highlights from above, because we're all used to observing lighting from the Sun. But the source of your light is coming from an object, the "highlights" will be placed differently, and the colour of that light will be stronger because it is in closer proximity.
The last point that struck me about his quote was to do with spotlights. Esthel on the left is a beautiful, entirely-lit portrait. The colours of her skin are fairly consistent because the lighting doesn't change. In contrast, Cozy on the right is spotlit. Her face is towards the light and her back is in shadow. We know she is light-skinned, but the colours used are just skin tone, they are two gradients - skin tones and blues. The spotlight helps to draw attention to her face, creating a focal point, and adding a little bit more drama to the scene. (Is it obvious that I'm a Dave fan yet?) In conclusion, thinking about light in different ways - direction, intensity, colour, spotlights, environmental and ambient light - helps to create an overall scene and tell a story. It'll take a lot of practice, but I'm glad I recognise these as concepts to think about and hopefully incorporate soon. If you enjoyed the article, please do consider donating your spare change on my Linktree https://linktr.ee/junebug.minis. It helps fund my art with supplies, new minis, and upskilling. Thanks for visiting, and enjoy the art!
A friend helped me order in some brushes from Creature Caster, and these (apart from a single W&N Series 7 000), are my first set of Kolinsky sable brushes. (Kolinsky) sable brushes are favoured by painters for having better water-retention properties, meaning your brush, and therefore paint, stays wet for longer. The bristles come from the fur of the Siberian weasel, rather than an actual sable, a marten native to Siberia and Russia. On the other hand, synthetic brushes are made with plastic bristles. Plastic is hydrophobic (repels water), but by the virtue of having many fine bristles, it can still hold water by capillary action. 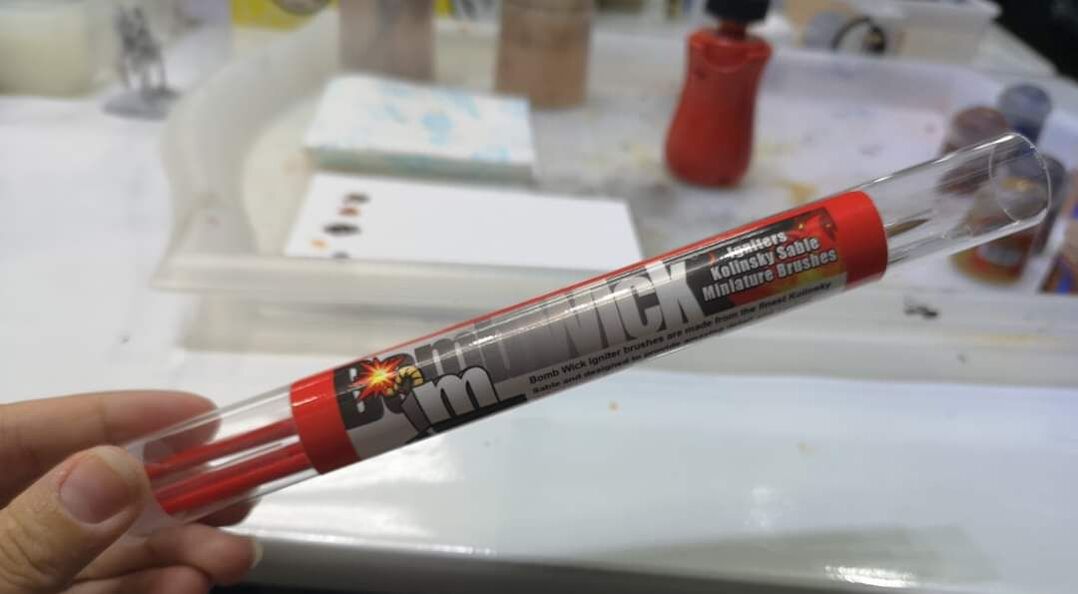 The Monument Igniter set comes with five brushes in sizes* 00, 0, 1, 2, and 3, shipped in a clear plastic tube for easy storage. I gave them a quick go over the weekend to see how they felt. Even though I'm still pretty novice at this, I could definitely feel a difference compared to the cheap art store synthetic brushes I'd been using up until now. Detail work like freehanding fine lines or painting tiny eyes is a dream. One thing that helps with painting tiny details (e.g. eyes) is having a small brush. However, I found that with synthetics, by the time I'd loaded the brush with a tiny amount of paint and positioned myself ready to carefully dot on the pupils, the paint had dried up. I got an even worse result with toothpicks - turns out it's because the wood absorbs water really well, drying up the paint. With the sable brushes, the paint stayed wet due to the aforementioned superior water-retention. These brushes also held their point really well. They stayed nice and sharp, and even though they're better quality and I was being super careful with them, all five sizes held a great point. It'll be great to see how long they can last with proper care - the man who sold me the W&N said he had inherited his grandmother's W&N kolinsky sable brushes! I'll still use my cheap synthetic brushes for the rougher work like priming, base coating, varnishing, and applying technical paints and some washes, but the sables work so beautifully for blending and fine detail. Really happy with this purchase! * Edit: Monument Hobbies now sells their painting supplies under their own name, while their miniatures are sold under the Creature Caster line. The Igniters have been upgraded to the Pro Sable product. If you enjoyed the article, please do consider donating your spare change on my Linktree https://linktr.ee/junebug.minis. It helps fund my art with supplies, new minis, and upskilling. Thanks for visiting, and enjoy the art!
|